How to Create an NFT Collection from Scratch
 by
by 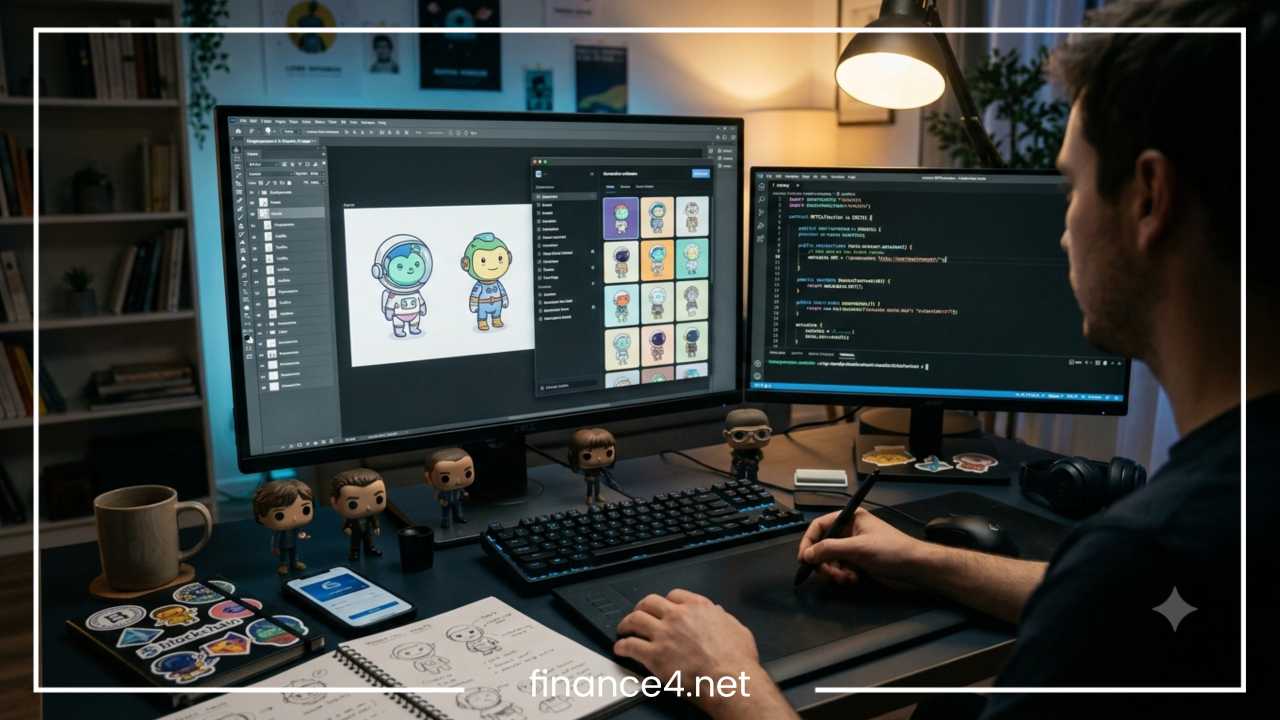
How to Create an NFT Collection from Scratch: Step-by-Step Guide
Non-Fungible Tokens have transformed the digital asset landscape by providing verifiable ownership, authenticity, and scarcity to digital content on the blockchain. While many creators enter the Web3 ecosystem by minting individual pieces of art, building a full NFT collection is an entirely different endeavor. An NFT collection is a curated series of unique tokens—often numbering in the hundreds, thousands, or tens of thousands—released under a single brand, smart contract, and ecosystem.
Creators, digital artists, entrepreneurs, and global brands develop NFT collections for diverse reasons. These range from constructing digital art series and gaming assets to establishing decentralized communities, offering membership access, and driving innovative business models.
Launching a successful collection requires a comprehensive approach. It is not a matter of simply uploading visual files to an online tool. A project demands strategic decisions across five core disciplines: creative direction, technical execution, financial planning, legal framework, and community marketing. This guide provides a thorough, step-by-step walkthrough covering the entire creation lifecycle—from initial concept development to post-launch asset management.
Understand How NFT Collections Work
Before launching a project, it is essential to master the underlying mechanics of blockchain technology and digital asset standards.
An individual NFT represents a single, non-interchangeable digital item. An NFT collection consists of multiple unique tokens deployed under a unified smart contract. Every token in a collection shares a common token contract address while retaining distinct token identifiers, attributes, and visual assets.
Smart contracts are self-executing programs deployed directly to a blockchain network. They automate rules, handle ownership transfers, track total token supplies, enforce creator royalty structures, and execute minting logic.
NFT collections primarily rely on established token standards. The table below highlights the primary differences between the two most prominent Ethereum-compatible standards:
| Feature | ERC-721 | ERC-1155 |
| Token Type | Non-Fungible (1-of-1 assets) | Multi-Token (Fungible, Non-Fungible, Semi-Fungible) |
| Batch Transfer | Requires separate transactions for each token | Allows multiple token types in a single transaction |
| Gas Efficiency | Higher gas overhead for multi-item transfers | Lower overall gas footprint for mass minting/transfers |
| Common Use Cases | Generative art, collectibles, domain names | Web3 gaming items, multi-tier access passes, event tickets |
NFT assets rely heavily on metadata. Metadata is a JSON-formatted file containing critical details about the token, such as its name, description, media location, and traits. Blockchains typically store this metadata off-chain using decentralized protocols like IPFS (InterPlanetary File System) to preserve network speed and reduce storage costs. The smart contract holds an immutable link—known as a Base URI—pointing directly to these off-chain metadata files.
Financial transactions across the network require a crypto wallet to sign interactions and pay gas fees. Gas fees represent the computational costs required to write data to the blockchain. When collectors mint an item during a primary sale, revenues go directly to the creator’s smart contract or wallet. For secondary market transactions on third-party platforms, creators can earn automated royalties, which distribute a specified percentage of subsequent sales back to the project treasury.
Define Your NFT Collection Concept
Establishing a defined identity, clear purpose, and solid narrative foundation must occur before writing code or generating digital artwork.
Define Project Intent and Identity
Identify the core objective of your project. Are you building a generative art collection, a gaming asset set, a digital membership pass, or an utility-driven project? Pinpoint your target demographic within the Web3 ecosystem and outline your value proposition. Determine what sets your collection apart from existing projects—whether that involves original art styles, real-world utility, exclusive access, or narrative storytelling.
Determine Collection Size and Type
Determine the total token supply based on your project goals and expected market demand. Common sizes for generative collections range from 1,000 to 10,000 units. Smaller sizes (e.g., 100 to 500 units) work better for high-end art or exclusive memberships, while larger sizes work for gaming ecosystems or mass-appeal collectibles.
Design Rarity Structures and Utility
Plan how traits and attributes will be distributed across the collection. Rarity structures create hierarchy and secondary-market interest. Assign statistical probabilities to different traits, ensuring that certain combinations remain exceptionally rare while others form the baseline supply. Define any functional utility associated with holding a token, such as token-gated content, physical merchandise redemption, voting rights, or access to exclusive events.
Conceptual Development Blueprint
Consider a hypothetical 5,000-piece digital art collection called Astro Explorers. The core identity centers on retro-futuristic space exploration. The project supply breaks down into distinct trait tiers: 70% common items, 20% rare suits and helmets, 9% epic cosmic gear, and 1% hand-crafted legendary tokens. Holding an Astro Explorer NFT serves as a membership pass to a community-managed research treasury and grants access to high-resolution physical print files.
Choose the Right Blockchain
Selecting the appropriate blockchain network dictates your project’s performance, user accessibility, development cost, and long-term liquidity. Avoid selecting a network based solely on minimal gas fees; balance transaction costs against ecosystem size, security infrastructure, and collector liquidity.
| Evaluation Metric | Ethereum | Polygon | Solana | Base |
| Transaction Fees | Variable (Medium to High) | Very Low | Extremely Low | Low |
| Transaction Speed | Moderate | Fast | Extremely Fast | Fast |
| Ecosystem Liquidity | Highest | High | High | Growing Rapidly |
| Security & Decentralization | Extremely High | High (Secured by Ethereum) | High | Secured by Ethereum |
| Marketplace Support | Universal | Universal | Wide Support | Wide Support |
| Developer Ecosystem | EVM (Solidity, Vyper) | EVM (Solidity, Vyper) | Rust, Anchor | EVM (Solidity, Vyper) |
Ethereum remains the industry standard for high-value collections due to its robust security, vast developer tooling, and deep liquidity pool. However, mainnet deployment costs and user minting gas fees can prove restrictive for micro-budget projects.
Polygon and Base act as Ethereum Layer 2 scaling solutions. They offer full EVM (Ethereum Virtual Machine) compatibility, allowing developers to deploy standard Solidity contracts while providing users with low gas costs and fast block confirmations.
Solana provides a distinct alternative using the Rust programming language. It delivers low transaction fees and high throughput. This combination makes it popular for high-volume mints, Web3 gaming assets, and lower-friction collector entry points.
When selecting your network, ensure that popular crypto wallets, major NFT marketplaces, and analytics platforms natively support the targeted chain.
Create the NFT Artwork and Collection Assets
The visual quality and structural execution of your digital assets directly impact your project’s credibility. Generative NFT collections use a layered visual architecture where individual traits combine algorithmically to create distinct images.
Designing Traits and Layer Hierarchies
Establish clear layer structures for your artwork. A standard character-based collection uses a stacked hierarchy of independent visual layers:
-
Backgrounds (Solid colors, patterns, abstract environments)
-
Base Bodies (Skin tones, textures, robotic variants)
-
Clothing & Outfits (Shirts, jackets, suits, armor)
-
Facial Features (Eyes, mouths, expressions)
-
Headwear & Accessories (Hats, glasses, helmets, handheld items)
Maintain precise, identical dimensions and canvas resolution (e.g., 2000×2000 pixels at 300 DPI) across every visual layer file. Ensure all trait layers line up perfectly over the base model. Save files in transparent PNG format to preserve background transparency across overlapping elements. Organize directory structures logically, placing each trait category in its own folder with standardized file naming conventions.
Generative vs. Manual Creation
For small collections (under 100 tokens), artists often paint or design each piece individually, resulting in 1-of-1 custom artworks.
For generative collections (1,000+ tokens), artists design individual trait layers manually, then rely on generative art scripts or specialized software to combine these layers programmatically. Software algorithms assemble one layer from each category based on predefined rules, exporting unique final images alongside their associated structural metadata.
Marketing and Promotional Graphics
In addition to the collection assets, design complementary visual media for branding. Prepare high-resolution banners, promotional teasers, wallet-connection interface art, collection profile avatars, and social media headers to maintain a consistent visual identity.
Generate the NFT Collection and Metadata
Once all visual traits are designed and exported, the next step involves generating the final image files and their accompanying metadata JSON files.
Configuring Trait Categories and Rarity Rules
Generative scripts rely on configuration setups to govern how traits combine. You can establish custom weightings for each trait to control rarity. For example, in a Background folder containing ten variations, a standard blue background might carry a 30% appearance weight, while a gold foil background carries a 1% appearance weight.
Scripts should also include conditional logic and exclusion rules to prevent visual errors. For example, if a character trait includes a large helmet, the script must be instructed to skip conflicting hair or eyewear traits.
The NFT Metadata Structure
NFT metadata standardizes how marketplaces, wallets, and dApps read and display your digital assets. Every generated image must have a corresponding JSON metadata file matching its unique token ID (e.g., 1.json, 2.json).
A standard metadata file includes essential key-value pairs that define the token:
| Key | Description | Example Value |
| name | The public display name of the specific token | Astro Explorer #104 |
| description | A brief narrative explaining the token and project | A collection of 5,000 unique space explorers journeying through Web3. |
| image | The IPFS content identifier pointing to the image | ipfs://QmXoypizjW3WknFiJnKLwHCnL72vedxjQkDDP1mXWo6uco/104.png |
| attributes | An array listing every trait category and trait value | Trait: Background / Value: Nebula Purple |
Decentralized Asset Storage via IPFS
Centralized web servers present a single point of failure; if the server goes down or the domain expires, the NFT metadata and image link break. Decentralized storage networks like IPFS solve this by utilizing content identifiers (CIDs)—hashes generated directly from the file content itself.
To deploy assets via IPFS:
-
Upload the folder containing all generated final images to IPFS using a pinning service (such as Pinata or NFT.Storage).
-
Copy the resulting IPFS CID for the images folder.
-
Update the image key inside all JSON metadata files with the image IPFS URI (e.g., ipfs://IMAGE_CID/104.png).
-
Upload the completed JSON metadata folder to IPFS to produce a final Metadata CID.
Local Metadata Verification
Inspect your generated outputs thoroughly before moving to blockchain deployment. Run automated validation scripts to check for duplicate DNA codes, missing attribute fields, broken image links, or layer clipping bugs.
Set Up a Crypto Wallet
A Web3 crypto wallet is required to sign smart contract deployments, manage project funds, pay gas fees, and interact with decentralized applications.
Key Wallet Management Concepts
-
Public Address: The shareable cryptographic identifier used to receive funds or assets.
-
Private Keys & Seed Phrases: Secret keys that grant full ownership and management permissions over the wallet. Never disclose private keys or seed phrases to anyone under any circumstances.
-
Dedicated Deployer Wallet: Avoid using personal wallets containing personal funds for project deployment. Create a brand-new, dedicated deployment wallet exclusively reserved for building, testing, and launching the collection.
-
Hardware Wallets: For security, use hardware wallets (cold storage) to sign deployment transactions and secure primary mint proceeds.
Configuring Testnet Environments
Before risking real cryptocurrency on a live mainnet, configure your software wallet (such as MetaMask) to access testnet environments like Ethereum Sepolia, Base Sepolia, or Polygon Amoy. Testnets replicate mainnet conditions precisely, allowing creators to deploy contracts, mint test tokens, and troubleshoot bugs using free testnet faucet currency.
Create or Deploy the NFT Smart Contract
The smart contract forms the core technical infrastructure of your NFT collection. It dictates token minting mechanisms, total supply caps, mint pricing, wallet allowances, revenue distribution, and metadata pointer locations.
Key Smart Contract Parameters
-
Name & Symbol: The official name of the token project (e.g., Astro Explorers) and its ticker symbol (e.g., ASTRO).
-
Max Supply: An immutable variable fixing the total number of tokens that can ever be minted (e.g., 5000).
-
Base URI: The IPFS link pointing directly to the directory housing your JSON metadata files.
-
Mint Price: The price in native cryptocurrency required for a public user to mint one token.
-
Max Mint Per Wallet: Security controls limiting how many tokens a single address can mint, preventing bot dominance during launches.
-
State Controls: Functions allowing admins to pause, unpause, open allowlist phases, or trigger public minting.
-
Royalty Configurations: Integration of on-chain royalty standards (such as EIP-2981) to signal fee payouts to secondary platforms.
No-Code Tools vs. Custom Code Development
Creators generally choose between two primary implementation paths:
| Feature | No-Code / Low-Code Platforms | Custom Smart Contract Development |
| Technical Requirement | None to minimal coding needed | High proficiency in Solidity, Rust, or Vyper |
| Setup Time | Fast, visual interface configuration | Longer development and testing timeline |
| Customization | Restricted to platform template features | Unlimited flexibility for bespoke mechanics |
| Gas Optimization | Standardized platform efficiency | Tailored optimization (e.g., ERC-721A batching) |
| Infrastructure | Embedded minting widgets and dashboards | Requires custom front-end Web3 integration |
No-Code & Low-Code Deployment Platforms: Services like Thirdweb, Manifold, and Studio platforms provide non-technical creators with visual interfaces to build, test, and deploy customized, fully owned ERC-721 or ERC-1155 smart contracts without writing code. These platforms often supply built-in minting widgets, embedded wallet support, and easy metadata management.
Custom Code Development: Projects requiring bespoke logic—such as staking systems, dynamic state changes, or gamified token mechanics—benefit from custom smart contract development. Developers write contracts using audited base frameworks like OpenZeppelin contracts to ensure security and gas efficiency.
Test Everything Before Launch
Once smart contracts are drafted and assets are formatted, conduct rigorous quality assurance on a testnet. Technical errors written to a live mainnet blockchain are permanent and irreversible.
Comprehensive Pre-Launch Testing Checklist
| Category | Verification Item | Test Status |
| Smart Contract | Verify total supply limits cannot be exceeded via script calls. | Completed |
| Smart Contract | Confirm pausing and unpausing mechanisms block/allow mints as expected. | Completed |
| Smart Contract | Test ownership transfer operations and admin privilege controls. | Completed |
| Metadata | Mint test tokens and confirm image URIs load instantly on testnet explorers. | Completed |
| Metadata | Inspect trait types, values, and spelling accuracy across test marketplace displays. | Completed |
| User Experience | Perform test mints using multiple test wallets on your website user interface. | Completed |
| User Experience | Confirm allowlist signatures or Merkle tree proofs correctly validate qualified buyers. | Completed |
| Financials | Execute withdrawal functions to ensure contract balance transfers cleanly to treasury. | Completed |
Executing this testing phase flags issues—such as incorrect base URI pointers, broken trait references, missing gas optimizations, or admin permission vulnerabilities—before real funds are committed.
Choose an NFT Marketplace
While collectors frequently mint tokens directly from a project’s dedicated website, secondary market liquidity and trading rely heavily on third-party NFT marketplaces.
Marketplace Selection Factors
-
Blockchain Compatibility: Choose platforms natively serving your target chain (e.g., OpenSea for EVM chains, Magic Eden for Solana and multi-chain assets).
-
Platform Fees: Review transaction fee schedules across trading venues; platforms typically charge a marketplace fee ranging from 1% to 2.5% per trade.
-
Royalty Enforcement Support: Investigate how individual platforms handle creator royalties. Some marketplaces mandate on-chain royalty payments, while others treat creator fees as optional tips set by the buyer.
-
Collection Verification Procedures: Understand platform requirements for securing official verification badges, which help collectors distinguish authentic contracts from copycat scams.
Deploying an audited, standard-compliant ERC-721 contract automatically makes your collection discoverable on major marketplaces once the first token is minted. Most platforms allow contract owners to log in via their deployer wallet to customize collection landing pages, upload display banners, write descriptions, and set default creator royalty preferences.
Plan the NFT Mint and Launch
A smooth minting experience requires detailed operational planning. The launch phase bridges your technical build with your prospective community of collectors.
Setting Pricing and Supply Parameters
Analyze current market conditions, network gas costs, and target audience purchasing power when establishing your mint price. Consider structuring your launch into tiered phases:
-
Allowlist / Presale Phase: Reserved for early community members, contributors, and partner project holders. Offering guaranteed mint access at a slightly discounted rate rewards early supporters while preventing network gas wars.
-
Public Mint Phase: Opens remaining un-minted supply to the wider public at standard pricing.
Preparing Mint Infrastructure
Develop a dedicated, responsive minting website that connects user crypto wallets (via SDKs like RainbowKit, ConnectKit, or Web3Modal) directly to your smart contract. Ensure the site infrastructure is hosted on scalable servers or decentralized platforms (like Vercel, Netlify, or IPFS) capable of handling heavy traffic spikes during launch windows.
Fund your administrative deployer wallet with sufficient native cryptocurrency to pay for mainnet deployment fees, contract initialization functions, state setting calls, and initial proof configurations.
Build a Community and Marketing Strategy
A robust technical implementation will fail without an active community. Marketing an NFT project involves building trust, communicating project utility, and maintaining clear communication.
Core Community Channels
-
Website: Serves as the central hub presenting project background, artwork previews, team identity, project roadmaps, and the wallet mint interface.
-
Social Channels: Use platforms like X to share visual teasers, hold live discussions, post project updates, and host community spaces.
-
Community Hubs: Build structured Discord or Telegram servers to organize project channels, manage allowlist roles, host events, and foster real-time discussion among prospective collectors.
Organic Marketing Pillars
| Strategy Pillar | Key Tactical Focus | Primary Objective |
| Content & Teasers | Share behind-the-scenes artwork generation, trait spot-checks, and project lore. | Build curiosity and visual appreciation |
| Strategic Partnerships | Coordinate cross-community allowlist swaps and co-branded spaces with established projects. | Expand reach to verified Web3 collectors |
| Transparent Communication | Host regular live audio spaces, share video updates, and define tangible value offers. | Establish trust and eliminate speculation |
Focus on organic community building rather than spamming promotional links. Share behind-the-scenes artwork generation, host creative contests, coordinate cross-promotional allowlist exchanges with established projects, and maintain consistent communication.
Avoid promising guaranteed financial returns, rapid price appreciation, or unrealistic long-term developments. Regulatory authorities and collectors alike view speculative financial claims critically. Center your messaging around the tangible value of the art, community access, brand vision, and immediate utility.
Launch the Collection
Launch day is the operational culmination of your project preparation. Execute a structured sequence to minimize technical friction and maintain community trust.
Launch Day Execution Steps
-
Final Security Verification: Double-check that all contract permissions, administrative roles, and treasury withdrawal addresses are set correctly.
-
Contract State Update: Toggle the smart contract state via your administrative wallet to enable the presale or allowlist phase.
-
Deploy Website Mint Page: Update your public website interface to reveal wallet connection options and minting call buttons.
-
Community Announcement: Publish official, verified minting links across your primary community channels (Discord, X, Telegram). Explicitly warn users about phishing sites, direct-message scams, and fake collection links.
-
Monitor Blockchain Activity: Track incoming mint transactions on block explorers to ensure smart contract calls process smoothly without high failure rates or gas bottlenecks.
-
Transition to Public Mint: Once the presale window concludes, update the contract state to enable public minting if inventory remains.
-
Finalize Metadata Reveal: If your collection utilizes an unrevealed placeholder art mechanism, call the contract function updating the base URI to point to the final metadata storage directory once minting finishes.
Manage the NFT Collection After Launch
Successfully minting out a collection is not the finish line; it marks the beginning of managing a live Web3 ecosystem.
Ongoing Operations and Treasury Management
-
Community Management: Keep community hubs active with regular project updates, team discussions, and ongoing events. Employ community moderators to protect channels against spam, phishing links, and malicious bots.
-
Delivering Utility: Execute planned utility offerings promptly, whether providing high-resolution digital media, distributing physical merchandise, unlocking private access channels, or executing physical event activations.
-
Treasury Oversight: Handle collected mint revenue responsibly. Secure funds within multi-signature wallets (such as Safe) that require multiple team approvals for transfers. Budget operational funds carefully to cover development expenses, marketing initiatives, team compensation, and infrastructure costs.
-
Secondary Market Presence: Update marketplace collection details, monitor secondary trading volume, handle counterfeit collection takedown requests, and maintain clear communications across secondary trading venues.
Common Mistakes to Avoid
Avoiding operational and strategic pitfalls is critical to preserving project viability and brand reputation.
-
Launching Without Audience Building: Minting a 10,000-piece collection without an active community usually leads to an unsuccessful launch. Build demand before deploying contracts.
-
Neglecting Contract Testing: Failing to thoroughly test smart contract code on a public testnet can result in locked funds, broken metadata links, or contract exploit vulnerabilities.
-
Overlooking Gas Optimization: Writing inefficient smart contract code forces collectors to pay unnecessary gas fees, lowering conversion rates during launch windows.
-
Insecure Key Management: Storing deployer seed phrases in unencrypted files, cloud drives, or taking photos of private keys exposes the entire project treasury to theft.
-
Intellectual Property Infringement: Using copyrighted visuals, trademarked names, or unlicensed audio assets without permission exposes creators to legal liability and platform takedowns.
-
Abandoning Communication Post-Launch: Halting communication after completing a mint damages creator credibility and community trust. Maintain consistent post-launch updates.
NFT Collection Launch Checklist
Use this high-level operational checklist to track project milestones through every development phase:
Concept Phase
-
Collection purpose and target audience defined
-
Total token supply and pricing structure established
-
Rarity distribution model and trait categories outlined
-
Project utility and holder benefits planned
Asset Phase
-
Base art model and layer dimensions standardized
-
All trait layers designed, exported, and visually validated
-
Algorithmic generation script executed to create images
-
Metadata JSON files built, tested, and validated
-
Image assets and metadata uploaded to IPFS pinning service
Technical Phase
-
Dedicated project wallet created and secured
-
Smart contract written or configured via reliable platform
-
Contract deployed to public testnet environment
-
Complete mint process and metadata integration tested on testnet
-
Production smart contract deployed to target mainnet blockchain
Launch Phase
-
Responsive minting website deployed with Web3 wallet support
-
Social channels established and community hubs active
-
Allowlist database compiled and validated
-
Minting schedule announced across official channels
-
Smart contract minting state enabled and monitored live
Post-Launch Phase
-
Collection metadata revealed on marketplaces (if applicable)
-
Primary sales revenue secured in a multi-signature wallet
-
Marketplace profiles verified and creator settings updated
-
Promised holder utility delivered according to plan
-
Community operations and ongoing updates maintained
Final Thoughts
Creating an NFT collection from scratch combines creative artistic design with advanced blockchain engineering, financial planning, and community management. Success in this space requires far more than simply uploading digital artwork to a marketplace; it requires careful planning, rigorous technical execution, clear security protocols, and a commitment to ongoing post-launch management.
By following a structured approach—defining a clear concept, organizing clean asset layers, writing robust metadata, testing smart contracts thoroughly on testnets, and building an engaged community—creators can build digital asset collections that offer real utility to holders and stand out in the Web3 ecosystem.
Frequently Asked Questions
How much does it cost to create a full NFT collection?
The cost of creating an NFT collection ranges from under $50 to several thousand dollars, depending primarily on your chosen blockchain network, asset storage choices, and contract creation methods. Deployment and minting fees on Layer-2 solutions or high-throughput chains (such as Polygon, Solana, or Base) cost a fraction of a cent per transaction. Conversely, deploying a smart contract directly to the Ethereum mainnet can incur gas costs ranging from $50 to upwards of $500 depending on network congestion. Additionally, using no-code creation platforms may incur flat platform fees or percentage-based mint revenue splits.
Can you create an NFT collection for free?
Yes, creators can launch an NFT collection with zero upfront platform fees by leveraging lazy minting protocols offered by popular Web3 marketplaces. Lazy minting defers the writing of smart contract data to the blockchain until the moment a buyer actually purchases the asset. When using this method, the gas fee required to mint the NFT is paid by the purchaser during the primary sale rather than by the creator during the setup phase.
How do you generate 10,000 unique NFTs automatically?
Generative 10k NFT collections are created algorithmically using generative art scripts (such as HashLips Engine or custom Node.js scripts) or dedicated visual generator software. Artists design stacked trait layers (such as backgrounds, bases, outfits, eyes, and hats) saved in uniform dimensions with transparent backgrounds. The software script programmatically picks one random asset from each trait folder based on assigned rarity percentages, combines them into a single image, and outputs a matching JSON metadata file for every individual token ID.
What is the difference between ERC-721 and ERC-1155 token standards?
ERC-721 is the standard protocol for strictly unique, 1-of-1 non-fungible tokens where every item in a collection possesses its own distinct ownership record and metadata. ERC-1155 is a multi-token standard that allows creators to issue both fungible assets and non-fungible tokens under a single smart contract. ERC-1155 enables batch transfers within a single transaction, significantly reducing overall gas fees for high-volume mints, gaming inventories, or tiered access passes.
Do I need to know how to code to launch an NFT smart contract?
No, coding experience is not required to deploy an NFT smart contract. Creators can utilize audited no-code development platforms (such as Thirdweb, Manifold, or marketplace studio tools) that offer visual interfaces for configuring collection supply, mint pricing, wallet limits, and revenue distribution. These platforms generate fully owned, standard-compliant smart contracts ready for mainnet deployment without requiring manual Solidity programming.
How do creators earn money from NFT secondary market sales?
Creators earn ongoing revenue from secondary market resales by configuring royalty rates (typically between 2.5% and 10%) directly within their smart contracts or marketplace settings. When a collector resells a token from the collection on a third-party marketplace, the platform automatically routes the specified royalty percentage directly to the creator’s designated treasury wallet address.