How to Bridge Tokens Between Blockchains
How to Bridge Tokens Between Blockchains: A Step-by-Step Guide
The blockchain landscape has evolved from a single dominant network into a vibrant, sprawling archipelago of independent ecosystems. While this growth has fostered innovation, it has also created a significant challenge: isolation. Most blockchains are built as closed loops, meaning they cannot naturally communicate or share assets with one another. This is where token bridging comes into play.
In this guide, we will explore the mechanisms that allow value to flow across the digital borders of the decentralized web. Whether you are a DeFi enthusiast looking for higher yields on a new Layer 2 or an NFT collector moving assets to a more cost-effective network, understanding how to bridge safely is a fundamental skill in the modern Web3 era. We will cover the conceptual foundations, the various types of bridges available, and a comprehensive step-by-step tutorial to ensure your cross-chain journey is secure and efficient.
The rise of cross-chain activity is a direct response to the fragmentation of liquidity. As developers launch new chains to solve specific problems—such as high throughput for gaming or enhanced privacy for finance—the necessity for a “connective tissue” becomes paramount. Bridging is not just a technical workaround; it is the infrastructure that enables a truly global, decentralized economy.
Understanding Blockchain Interoperability
To understand bridging, one must first understand the concept of interoperability. In the context of computer science, interoperability is the ability of different systems to exchange and make use of information. In the blockchain world, this refers to the capacity for different networks—like Ethereum, Solana, and BNB Chain—to talk to one another.
The Silo Problem
By design, blockchains are autonomous. They have their own consensus mechanisms, security protocols, and ledger histories. A smart contract on Ethereum has no inherent way of knowing what is happening on the Bitcoin network or the Polygon sidechain. This lack of communication creates silos, where liquidity and data are trapped within specific boundaries. For example, if you own ETH on the Ethereum Mainnet, that ETH does not exist on the Solana blockchain. To use its value there, a translation layer must exist.
Multi-Chain vs. Cross-Chain
As the industry has matured, we have shifted from a single-chain focus to a multi-chain reality. It is important to distinguish between these terms:
-
Single-chain: An application that exists only on one network.
-
Multi-chain: Refers to a project or ecosystem that exists on several different blockchains independently. For instance, Uniswap exists on Ethereum, Arbitrum, and Polygon. However, the liquidity on Ethereum is separate from the liquidity on Polygon.
-
Cross-Chain: Refers to the actual technology that allows those different chains to interact and exchange value or data. This is the “bridge” itself.
Interoperability is the bridge that connects these islands. It allows for a more fluid user experience where assets aren’t just stuck where they were minted, but can be moved to wherever they provide the most utility. Without interoperability, the blockchain space would remain a collection of competing, isolated technologies rather than a unified financial system.
What Are Token Bridges?
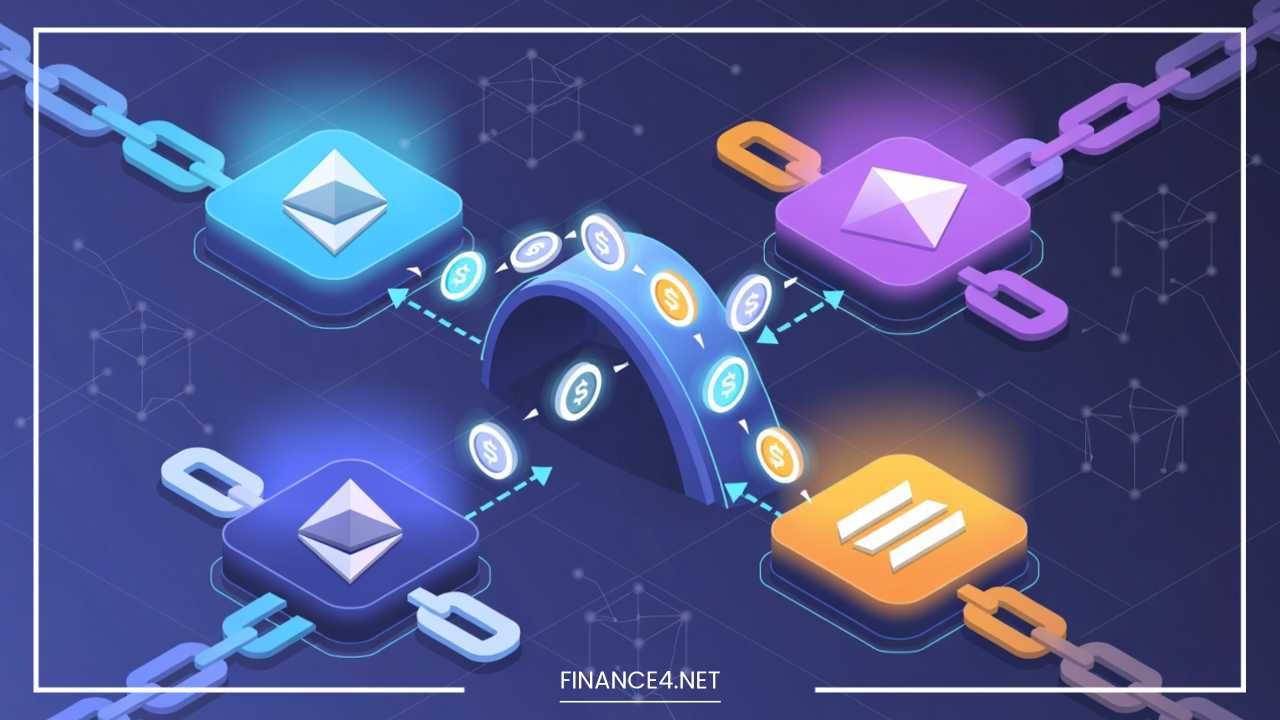
A blockchain bridge is a tool that allows a user to transfer assets or data from one blockchain to another. It acts as a connector, providing a pathway for information to travel between incompatible environments.
What Happens During a Bridge?
It is a common misconception that tokens literally travel across the internet from one chain to another. In reality, the process is usually handled through a Lock-and-Mint or Burn-and-Mint mechanism.
-
Locking: You send your tokens to a specific address or smart contract on the Source Chain (e.g., Ethereum). These tokens are effectively taken out of circulation and held in a secure vault managed by the bridge.
-
Validation: The bridge monitors this transaction. It waits for the source chain to reach finality—meaning the transaction cannot be reversed. Once verified, the bridge confirms the assets are secured.
-
Minting: Once verified, the bridge instructs a smart contract on the Destination Chain (e.g., Polygon) to mint an equal amount of tokens. These are often “wrapped” versions of the original asset.
Wrapped Tokens Explained
If you bridge Ethereum (ETH) to the BNB Chain, you don’t receive native ETH. Instead, you receive a representation of that ETH, often called Wrapped ETH (WETH) or binance-peg ETH. This wrapped token is a 1:1 claim on the original asset held in the bridge’s vault. Think of it like a coat check ticket: the ticket isn’t the coat, but it proves you own the coat held in the closet and allows you to claim it back later. When you want to return to the original chain, you burn the wrapped token, and the bridge unlocks the original asset on the source chain.
Custodial vs. Non-Custodial Bridges
The level of control you maintain during this process depends on the bridge type:
-
Custodial Bridges: These are managed by a central entity. You trust them to hold your assets and provide the equivalent on the other side.
-
Non-Custodial Bridges: These rely on smart contracts and decentralized protocols to manage the transfer. No single human or company has control over your funds; the code is the law.
Types of Blockchain Bridges
Not all bridges are built the same way. The architecture behind a bridge determines its security, speed, and cost. Understanding these categories helps you make an informed decision based on your risk tolerance.
1. Trusted (Custodial) Bridges
Trusted bridges rely on a central intermediary or a federation of entities to manage the bridge. They essentially say, “Trust us, we have your tokens locked up safely.”
-
How they work: You send funds to a centralized address, and the entity manually or via proprietary software credits you on another chain.
-
Pros: Often have very high liquidity and are extremely user-friendly. They often provide customer support if a transaction gets stuck.
-
Cons: You are giving up control of your private keys. If the central entity is hacked, goes bankrupt, or decides to freeze your account, you may lose your assets.
-
Who should use them: Large institutional players who require high-touch service or beginners who are moving funds directly from a centralized exchange (CEX) like Coinbase or Binance.
2. Trustless (Decentralized) Bridges
These bridges use mathematical proofs, light clients, or decentralized validator sets to facilitate transfers. Security is derived from the underlying code and the consensus of the network.
-
How they work: Smart contracts on both chains communicate via a decentralized messaging protocol. The bridge checks the cryptographic proofs of the source chain before releasing funds on the destination chain.
-
Pros: Users maintain self-custody. The process is transparent, and anyone can audit the code.
-
Cons: They are only as secure as the code they are written in. Smart contract bugs are a significant risk factor, and these bridges are often more expensive to use because they require more on-chain computation.
3. Native vs. Third-Party Bridges
-
Native Bridges: These are built by the developers of a specific blockchain to attract users to their ecosystem (e.g., the Arbitrum Bridge or the Avalanche Bridge). They are generally considered the safest way to move to that specific ecosystem because the incentives of the bridge and the chain are aligned.
-
Third-Party Bridges (Aggregators): These are independent protocols that connect dozens of different chains (e.g., Stargate, Hop Protocol, or Across). They are often faster and cheaper than native bridges because they use liquidity pools rather than minting/burning mechanisms, but they add an extra layer of smart contract risk.
4. One-Way vs. Two-Way Bridges
-
One-Way: Assets can only move from the source to the destination. These are rare today but were used in early blockchain migrations.
-
Two-Way: Assets can move freely back and forth. This is the standard for modern DeFi, allowing users to hop between chains to find the best opportunities.
Step-by-Step Guide: How to Bridge Tokens Between Blockchains
Bridging can feel intimidating the first time, but if you follow a methodical process, it becomes second nature. Here is the comprehensive workflow for a standard cross-chain transfer.
Step 1: Choose the Right Bridge
Before you start, identify which bridge supports both your starting chain and your destination chain.
-
Check compatibility: Does it support the specific token you want to move? Not all bridges support all tokens.
-
Compare fees: Look at both the bridge fee and the estimated network gas costs.
-
Review Liquidity: Ensure the bridge has enough depth to handle your transaction size. If you try to bridge $100,000 through a bridge with only $50,000 in liquidity, you will face massive slippage.
Step 2: Prepare Your Wallet
Ensure your wallet (like MetaMask, Phantom, or Trust Wallet) is set up for both networks.
-
Network Configuration: If you are bridging to a network like Avalanche or Base, you may need to add the network settings to your wallet. Use a tool like Chainlist to do this safely.
-
Gas Tokens: This is the most common mistake beginners make. To bridge from Ethereum to Polygon, you need ETH on Ethereum to pay for the initial transaction. However, once you arrive on Polygon, you will need MATIC (or the native gas token) to do anything else. Without gas on the destination chain, your tokens will be “stuck” until you can acquire some. Some modern bridges offer a “Gas on Destination” feature where they swap a small portion of your bridged amount into the native gas token for you.
Step 3: Connect Wallet to Bridge
Navigate to the official bridge website. Always double-check the URL to avoid phishing sites. Click “Connect Wallet” and approve the connection request in your browser extension. Ensure you are connected to the correct source network in your wallet.
Step 4: Select Token and Amount
Choose the token you wish to bridge (e.g., USDC) and the destination network. Enter the amount.
-
Check Limits: Some bridges have a minimum or maximum transfer limit per transaction.
-
Verify the “Received” Amount: The bridge should show you exactly how much you will receive on the other side after all fees are deducted.
Step 5: Approve and Initiate Transfer
In the world of smart contracts, you must grant a contract permission to “spend” your tokens before it can move them.
-
Approve: You will sign a transaction in your wallet giving the bridge permission to access your USDC. This costs a small amount of gas.
-
Initiate: Once the approval is confirmed on-chain, click the “Bridge” or “Transfer” button. This is the main transaction that actually locks or burns your funds.
Step 6: Confirm Transaction on Source Chain
Your wallet will pop up with a final confirmation. Review the gas fees. If the network is congested, you may want to increase the gas price to ensure the transaction doesn’t get stuck in the “pending” state for hours. Once confirmed, the bridge will usually provide a transaction hash or a link to a block explorer like Etherscan.
Step 7: Receive Tokens on Destination Chain
After the source chain transaction is confirmed, the bridge validators or relayers will process the request. Depending on the bridge architecture, this can take anywhere from 5 minutes to 20 minutes (or longer for certain Layer 2 withdrawals).
-
Switch Networks: Change your wallet’s network to the destination chain.
-
Add Custom Token: If your tokens don’t appear, don’t panic. You may need to import the “Token Contract Address” manually so your wallet knows to display the balance. You can find these addresses on sites like CoinGecko or the destination chain’s block explorer.
Fees, Speed, and Costs Explained
Bridging is rarely free. To avoid surprises, you must account for the different layers of costs involved in a cross-chain move.
1. Source Chain Gas Fees
This is the fee paid to the miners or validators of the network you are leaving. If you are bridging from Ethereum Mainnet, this can be expensive—ranging from $5 to $50 or more depending on network congestion. If you are bridging from a Layer 2 like Arbitrum, this cost is usually negligible.
2. Bridge Service Fees
Most third-party bridges charge a fee to maintain their liquidity and pay their relayers. This is usually either a flat fee (e.g., $1 worth of the token) or a percentage (e.g., 0.1% of the total amount).
3. Destination Chain Gas Fees
In some designs, the bridge covers the cost of minting the tokens on the destination chain for you. In others, you must manually “claim” your tokens once they arrive, which requires you to have gas tokens already present on the destination chain.
4. Slippage and Price Impact
If a bridge uses liquidity pools (like a DEX), your transfer might change the ratio of assets in that pool. For large transfers, this can result in receiving slightly fewer tokens than the current market rate.
Speed is primarily determined by “finality.” A bridge must be certain that your source transaction cannot be “re-orged” or cancelled. While some chains like Solana or Avalanche have near-instant finality, Ethereum can take several minutes. Optimistic Rollups (like Optimism or Arbitrum) have a unique “challenge period” for their native bridges, which can result in a 7-day wait when moving funds back to Ethereum Mainnet. Third-party liquidity bridges often bypass this wait for a small fee.
Security Risks and How to Stay Safe
Bridges are the “Achilles’ heel” of the current blockchain ecosystem. Because they act as massive vaults holding billions of dollars in locked liquidity, they are the primary target for sophisticated hackers.
Major Risks
-
Smart Contract Vulnerabilities: Even the most audited code can have bugs. If a hacker finds a way to “trick” the bridge into thinking they locked funds they didn’t, they can mint infinite tokens on the destination chain, effectively draining the vault.
-
Validator Compromise: Some bridges are secured by a “Multi-Sig” wallet or a small set of validators. If a majority of these validators are compromised (as seen in the famous Ronin Bridge hack), the attackers can authorize any withdrawal they want.
-
Phishing and Social Engineering: Scammers create near-perfect replicas of bridge websites. If you connect your wallet to a fake site, they can drain your entire balance within seconds.
Best Practices for Safety
-
Use a “Burner” Wallet: Never bridge from your primary “cold storage” or “long-term hold” wallet. Transfer the specific amount you want to bridge to a fresh wallet, perform the bridge, and then move the funds to their final destination.
-
Test with Small Amounts: Before moving a life-changing sum of money, send a $10 test transaction. Ensure you can see the funds on the other side and that you understand the “claim” process.
-
Check Revoke.cash: After your bridge is successful, use a tool like Revoke.cash to cancel the “Approval” you gave to the bridge. Leaving “Infinite Approvals” active is a security risk if the bridge is hacked later.
-
Stick to Established Names: While a new, unproven bridge might offer 0% fees, the risk of a rug-pull or a bug is much higher. Use bridges with high Total Value Locked (TVL) and a long history of uptime.
-
Verify URLs: Bookmark official bridge sites from reputable sources like the official Twitter (X) profiles or project documentation. Never click bridge links from Google Ads, as these are often scams.
Common Use Cases for Bridging Tokens
Why go through the effort and risk of bridging? The reasons are usually driven by economic opportunity or utility.
1. Accessing DeFi Ecosystems
Different blockchains have different decentralized finance (DeFi) “flavors.” You might bridge to Avalanche to use Trader Joe, or to Arbitrum to trade perpetual futures on GMX. Often, newer chains offer “liquidity mining” rewards where they pay you in their native token just for using their protocols.
2. Lowering Transaction Costs
The primary reason many users bridge away from Ethereum Mainnet is cost. For a retail user with a $1,000 portfolio, a $20 swap fee represents 2% of their total value. By bridging to a Layer 2, that same user can perform hundreds of swaps for the same $20.
3. Moving NFTs Across Ecosystems
While most NFTs are tied to the chain they were minted on, cross-chain NFT bridges are becoming more common. This allows a user to move their digital art to a chain where the marketplace fees are lower or where they can use the NFT as collateral for a loan.
4. Yield Arbitrage
Professional traders monitor interest rates across all chains. If USDC is earning 2% on Ethereum but 8% on Base, they will bridge millions of dollars to capture the 6% difference.
5. Participating in Web3 Gaming
Many high-performance games require their own subnets or sidechains to handle the thousands of micro-transactions generated by gameplay. To buy a sword, a potion, or a character, you must bridge your funds into the game’s specific ecosystem.
Limitations and Challenges of Token Bridges
Despite their utility, bridges are not a perfect solution. They are a “patch” for a fragmented system, and they come with several inherent limitations.
-
Liquidity Fragmentation: Instead of having $10 billion in one deep pool on Ethereum, we now have $1 billion spread across ten different chains. This leads to higher slippage and less efficient markets.
-
Complexity for Non-Technical Users: The requirement to manage multiple gas tokens and manually switch networks in a wallet is a major hurdle for “mass adoption.”
-
Wrapped Token Proliferation: If you bridge USDC via Bridge A, you get “USDC.a.” If you use Bridge B, you get “anyUSDC.” These are not always interchangeable, leading to a confusing mess of “fake” versions of the same stablecoin on a single chain.
-
Regulatory Uncertainty: As bridges facilitate the movement of billions of dollars across borders without KYC (Know Your Customer), they are increasingly being scrutinized by global regulators.
Future of Cross-Chain Bridging
The ultimate goal of the blockchain industry is to make the bridge disappear. This concept is often called Chain Abstraction or Intent-Based Networking.
In the future, you won’t need to know you are bridging. You will simply click a button that says “Buy this NFT on Solana using my ETH on Arbitrum.” The underlying infrastructure will automatically find the best bridge, perform the swap, handle the gas fees on both sides, and deliver the asset to your wallet in a single transaction.
Technologies like the Inter-Blockchain Communication (IBC) protocol used by Cosmos and Chainlink’s Cross-Chain Interoperability Protocol (CCIP) are moving us toward a world where blockchains are as interconnected as the servers that power the modern internet. In this future, the “source chain” and “destination chain” become irrelevant; all that matters is the asset you hold and the service you want to use.
Final Thoughts
Bridging tokens is a gateway to the full potential of the decentralized web. It transforms blockchains from isolated silos into a connected global economy. While the process requires a careful eye on security, fees, and network settings, mastering the bridge allows you to move freely to where the innovation—and the profit—is happening.
As you move forward, always remember the golden rules of the cross-chain traveler: Verify your URLs, never share your recovery phrase, test with small amounts, and always keep a little extra gas in your wallet.
The multi-chain world is here to stay. By learning how to navigate the bridges that connect it, you are positioning yourself at the forefront of the next evolution of finance and digital ownership.