How to Mint Generative NFTs Cross-Chain
How to Mint Generative NFTs Cross-Chain | Step-by-Step Guide
The digital art revolution is in full swing, and at its forefront are Non-Fungible Tokens (NFTs). While initially gaining traction as simple digital collectibles, NFTs have evolved dramatically, with generative NFTs emerging as one of the most exciting and complex forms. Generative art is created by algorithms, often resulting in unique and unpredictable outcomes that blend technology and artistic vision. Projects like Art Blocks have popularized this format, demonstrating the immense value in algorithmically-derived digital ownership.
However, the early NFT landscape was fragmented, primarily dominated by high-cost, high-traffic chains like Ethereum. The rapid proliferation of new, efficient, and cheaper blockchains—Solana, Polygon, Avalanche, and others—has created a need for broader accessibility. This is where cross-chain minting becomes essential. Cross-chain functionality allows an NFT minted on one blockchain to be recognized, traded, and verified on another, unlocking unprecedented liquidity and audience reach.
This comprehensive guide is designed to navigate the complexities of minting generative NFTs across multiple chains. We will detail every step, from understanding the core concepts of generative art and blockchain interoperability to executing a secure cross-chain minting strategy. By the end of this article, you will possess the knowledge to strategically deploy your generative collection across the multi-chain ecosystem, maximizing its potential and minimizing friction for your collectors.
Understanding Generative NFTs
Generative NFTs are digital assets where the final artwork is created by code or an algorithm, often in real-time at the moment of minting. This distinguishes them fundamentally from standard NFTs, which are typically digital representations of pre-rendered, static images, videos, or music files.
The creation process of a generative collection starts with an artist defining a set of rules, parameters, and a library of visual traits or components—colors, shapes, backgrounds, accessories, etc. The underlying algorithm then randomly, or semi-randomly based on weighted rules, combines these elements to produce a massive number of unique outputs.
How They Differ from Standard NFTs
| Feature | Standard (PFP, 1/1 Art) NFT | Generative NFT |
| Creation Method | Pre-rendered by the artist; static file. | Created by an algorithm/code based on artist-defined parameters. |
| Uniqueness | Usually unique as a whole piece, or from a pre-defined set. | Algorithmically unique; each output is a novel combination of traits. |
| Metadata | Static metadata pointing to a pre-existing file. | Often includes the seed or hash that generated the output, detailing its parameters. |
| Rarity | Based on artist/market perception. | Based on the statistical probability of combining rare traits. |
Popular examples like Art Blocks, Fidenza by Tyler Hobbs, and Ringers by Dmitri Cherniak are pioneers in this space, often hosting the generative script directly on the blockchain. Less complex versions use off-chain scripts (like p5.js or Python) to generate the final collection files and then upload those static assets.
The role of algorithms, randomness, and metadata is critical. The quality of randomness ensures that no two pieces are identical, while the metadata is key to their verifiable uniqueness, detailing the specific combination of traits that constitute that token, and critically, how those traits map to different levels of rarity.
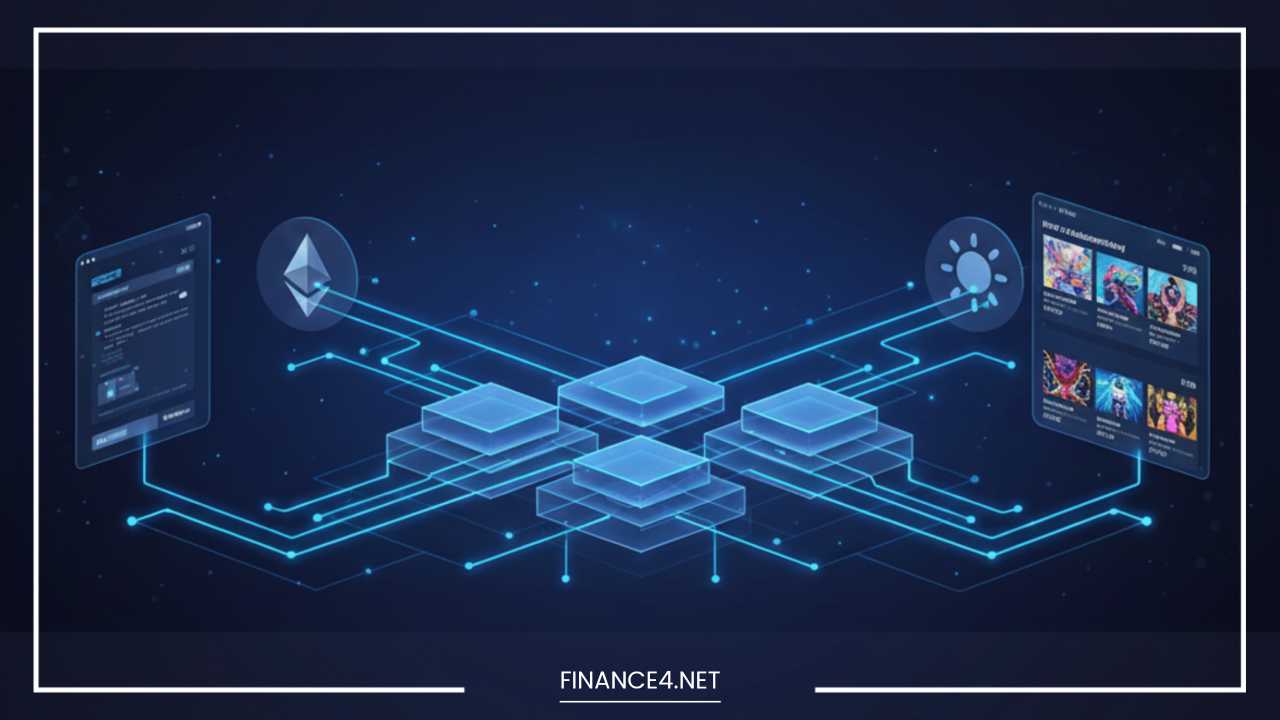
The Concept of Cross-Chain NFTs
In the blockchain context, cross-chain refers to the ability to transfer data, tokens, or, in our case, NFTs, between two distinct, sovereign blockchains—for example, moving an asset from Ethereum to Polygon, or from BNB Chain to Avalanche.
Blockchains are inherently siloed; they operate on different consensus mechanisms, smart contract languages, and security models. Cross-chain solutions, often called bridges, are middleware designed to establish communication and asset movement between these otherwise disconnected networks.
Advantages of Cross-Chain NFT Minting
Deploying a collection across multiple chains offers significant strategic advantages:
-
Access to Multiple Marketplaces: While OpenSea is dominant, chain-specific marketplaces like Magic Eden (Solana) or Joepegs (Avalanche) cater to unique user bases. A cross-chain NFT can be listed where its collectors prefer to transact.
-
Lower Fees on Alternative Chains: Ethereum gas fees can be prohibitively high for both the minter and the collector. Minting options on cheaper chains like Polygon or Solana dramatically lowers the barrier to entry, increasing collector volume.
-
Broader Audience and Liquidity: By not being restricted to one chain’s liquidity pool, your generative collection gains visibility across a wider ecosystem of DeFi users, collectors, and investors, significantly increasing its potential for sale and price discovery.
Challenges
While the benefits are clear, cross-chain technology is nascent and presents challenges:
-
Compatibility: Ensuring that the NFT token standards (e.g., ERC-721) are correctly interpreted and mapped by the bridging protocol on the destination chain.
-
Bridging Security: Cross-chain bridges are complex and have been the target of high-profile exploits. Choosing a secure, well-audited bridge is paramount.
-
Smart Contract Limitations: Deploying the generative script itself across chains can be difficult. The strategy often shifts to generating the assets off-chain, minting on a primary chain, and then bridging the token to the secondary chain, rather than running the script natively on every chain.
Pre-Requisites for Minting Generative NFTs
Before diving into the code and deployment, a solid foundation of tools and platform knowledge is essential.
Wallet Setup
You will need a non-custodial cryptocurrency wallet that supports the chains you plan to use.
-
EVM-Compatible Chains (Ethereum, Polygon, Avalanche, etc.): MetaMask is the industry standard.
-
Solana: Wallets like Phantom or Solflare are required.
Ensure your chosen wallet is correctly configured to display and interact with the primary and secondary blockchain networks. You will need native tokens (ETH, SOL, MATIC, AVAX) in your wallet to cover transaction fees.
Understanding Blockchain Fees
Transaction fees, often called gas fees on Ethereum and other EVM chains, are the cost of computing and validating your transactions (like smart contract deployment and minting).
-
Ethereum (High Gas): Fees can fluctuate dramatically. Minting requires strategic timing or a high tolerance for cost.
-
Alternative Chains (Low Fees): Chains like Polygon (Layer 2) and Solana offer near-zero or negligible fees, making them highly attractive for large-scale generative collections. Your primary chain choice will significantly affect your startup costs.
Choosing a Blockchain(s) for Minting
The optimal choice is often a multi-chain strategy:
-
Primary Chain (The Anchor): This is where your master smart contract lives and where the first minting event occurs. It’s often Ethereum for its maximum credibility and security, despite the cost.
-
Secondary Chain(s) (The Reach): These are the target chains for cross-chain deployment, typically chosen for their low fees and high throughput (e.g., Polygon, BNB Chain, Solana).
Tools and Platforms Required
The toolkit for a generative NFT project is diverse:
-
NFT Marketplaces:
-
Multi-Chain: OpenSea (supports Ethereum, Polygon, Klaytn).
-
Chain-Specific: Magic Eden (Solana), Rarible (Multi-Chain), LooksRare (Ethereum).
-
-
Generative Art Platforms:
-
On-Chain Script: Art Blocks (for highly curated, code-on-chain projects).
-
Asset Generation: Async Art (for dynamic, programmable art), or custom scripts for static asset generation.
-
-
Code Environment: A local development environment for art creation, metadata preparation, and smart contract deployment.
Creating Generative NFT Art
The heart of a generative NFT is the code that breathes life into the visual traits. This stage focuses on creating the assets and the necessary metadata structure.
Tools and Frameworks
The choice of tool depends on the desired complexity and output format:
-
p5.js and Processing: Popular for browser-based, visual generative art. These JavaScript/Java frameworks are excellent for creating organic, interactive, or abstract visual outputs.
-
Python Libraries (Pillow, NumPy): Ideal for batch-processing, manipulating existing images, or building complex systems that rely on mathematical or data-driven inputs.
-
NFT Art Platforms: Platforms offer streamlined interfaces, reducing the need to write contract code but often limiting artistic control and complexity.
Structuring Traits and Layers
Generative art operates on the principle of layering and randomization.
-
Define a Trait List: Identify all possible features (e.g., Background, Body, Headwear, Eyes, Mouth). Each feature becomes a “layer.”
-
Create Trait Variants: For the “Headwear” layer, create various options (e.g., “Beanie,” “Halo,” “None,” “Crown”). These are the individual assets.
-
Assign Rarity: Rarity is determined by the weight assigned to each variant. For example, a “Beanie” might have a 30% chance of appearing, while a “Crown” has a 0.5% chance. The rarer the trait, the higher the value of the final token containing it.
-
The Generation Script: The script must:
-
Select a random variant for each trait based on its weighted probability.
-
Overlay the corresponding image files in the correct sequence to produce the final artwork.
-
Crucially, record the selected combination for the metadata.
-
Exporting Assets and JSON Metadata
Once the art generation is complete (often thousands of images), you must prepare the files for blockchain deployment:
-
Image Files: Store the final images (PNG or JPEG) on a decentralized storage network like IPFS (InterPlanetary File System) or Arweave. This ensures the immutability of the art. Record the unique IPFS hash for each image.
-
JSON Metadata: Each NFT requires a corresponding JSON file that adheres to common standards (like the ERC-721 or ERC-1155 metadata standard). This file must contain:
-
name: The name of the token (e.g., “Generative Piece #102”). -
description: A brief description. -
image: The unique IPFS URL of the corresponding image. -
attributes: An array of objects defining the traits and their values (e.g.,{"trait_type": "Headwear", "value": "Crown"}).
-
Tips for Ensuring Uniqueness and Randomness
-
Hash Seed: Use the transaction hash or a deterministic block hash from the primary chain as the seed for your random number generator. This ties the art generation to the blockchain itself, proving the randomness and immutability.
-
Check for Duplicates: Before final asset upload, run a script to ensure that no two trait combinations were accidentally generated, or if they were, that the system accounts for this.
-
Revealed vs. Unrevealed: Often, generative projects launch with unrevealed art, showing a placeholder image. The final art is revealed after a set time or a total sell-out, often using the final transaction hash of the reveal to seed the generation, ensuring true randomness.
Minting Generative NFTs on a Single Blockchain
The initial minting process involves deploying a smart contract on the Primary Chain. We will assume an EVM-compatible chain (Ethereum, Polygon) for this example.
Step-by-Step Minting Guide
-
Contract Creation and Auditing:
-
Use a well-vetted contract standard, such as the ERC-721Enumerable or a custom contract built on established libraries like OpenZeppelin.
-
Ensure the contract includes functions for whitelisting, public sale, setting royalty percentages (usually 5% to 10%), and defining the base URI (the link to your root metadata folder on IPFS).
-
Crucially: Have the contract professionally audited before mainnet deployment.
-
-
Uploading Assets and Setting Base URI:
-
Upload all image and JSON metadata files to IPFS.
-
Set your contract’s base URI to the IPFS directory URL where your metadata is stored. The smart contract will automatically append the token ID (e.g.,
/1,/2) to this base URI to fetch the specific JSON file for each token.
-
-
Deployment: Use a tool like Remix or a command-line interface (CLI) with Hardhat or Truffle to deploy your contract to the Primary Chain (e.g., Ethereum Mainnet) using your MetaMask wallet. This will require a significant gas fee.
-
Minting/Enabling Sale:
-
Once deployed, call the contract’s function to either pre-mint the tokens to your own wallet for later distribution, or to activate the sale function (whitelist, then public).
-
The collector then calls the
mintfunction on your contract, sending the required payment. The contract automatically assigns the next available token ID to the collector’s address.
-
Testing on Testnets Before Mainnet
Never deploy a complex generative project directly to the Mainnet. Use Testnets (like Sepolia for Ethereum, or the corresponding testnet for your chosen chain) to simulate the entire process: deployment, base URI configuration, minting, marketplace listing, and transferring. This is essential for debugging.
Common Mistakes to Avoid
-
Incorrect Base URI: If the link is wrong, the NFTs will appear broken on marketplaces (no image/metadata).
-
IPFS Pinning: Failing to pin your IPFS files to a reliable service (Pinata, Web3.Storage) can cause your images to disappear if your local node goes down.
-
Royalty Errors: Incorrectly setting the royalty split in the contract can lead to lost secondary sale revenue.
Cross-Chain Minting Process
Cross-chain minting, in the context of generative art, typically involves minting the master token on the Primary Chain and then bridging the existing token to a Secondary Chain.
Options for Cross-Chain Minting
-
Using Cross-Chain Bridges: This is the most common method. Bridges like Wormhole, LayerZero, and Polygon Bridge work by locking the original NFT on the Primary Chain and minting a wrapped/synthetic version of that token on the Secondary Chain.
-
Multi-Chain NFT Marketplaces: Some platforms are building native multi-chain support that abstracts the bridging process, making it seamless for the user.
-
Deploying Smart Contracts on Multiple Chains: You can deploy the exact same smart contract to multiple chains. However, this raises questions about which chain hosts the “original,” which can confuse collectors and marketplaces. This method is usually avoided in favor of the locking/wrapping mechanism.
Step-by-Step Example: Bridging from Ethereum to Polygon (Layer 2)
We will use a generalized bridging concept, which applies to most protocols.
1. Mint on Primary Chain
The generative NFT is minted on the Primary Chain (Ethereum Mainnet) as described in the previous section. The NFT is now a verifiable asset on the Ethereum network.
2. Bridge NFT to Secondary Chain (Polygon)
-
Initiate Bridging: The NFT owner (you, or the collector) navigates to the chosen cross-chain bridge (e.g., Polygon Bridge or a third-party bridge).
-
Select Asset: The user connects their wallet and selects the specific generative NFT (by contract address and token ID) they wish to bridge.
-
Lock and Mint:
-
The bridge contract on Ethereum locks the original ERC-721 token, making it untransferable on Ethereum.
-
The bridge relayers confirm the lock.
-
The bridge contract on the Polygon chain mints a wrapped version of the NFT. This wrapped NFT is a new token on Polygon (with a new contract address) that points back to the locked original on Ethereum.
-
-
Receive Wrapped NFT: The user receives the wrapped NFT in their wallet on the Polygon network. The NFT retains the exact same image and metadata (as the metadata URI is often static and IPFS-based).
3. Verify Ownership and Metadata Consistency
-
The wrapped NFT is now active on the Polygon chain. It can be listed on Polygon-native marketplaces (like OpenSea’s Polygon network view).
-
The ownership is verifiable on Polygon’s explorer (e.g., PolygonScan).
-
The original NFT is verifiable as locked by the bridge contract on the Primary Chain’s explorer (Etherscan). This locking mechanism ensures that only one version of the asset can be actively traded at any given time, maintaining scarcity.
Risks and Security Considerations
-
Bridge Vulnerabilities: The biggest risk is the security of the bridge itself. Always use well-known, high-volume, and independently audited bridges.
-
Impermanence of Wrapped Assets: If the underlying bridge protocol fails or is exploited, the wrapped assets on the Secondary Chain could become worthless if they cannot be redeemed for the locked original.
-
Metadata Drift: Ensure the IPFS links are absolute and decentralized. If your contract relies on a centralized server for metadata, cross-chain deployment will fail if that server goes down. Decentralized storage is non-negotiable.
Listing and Selling Cross-Chain NFTs
Once your generative NFT is successfully minted and perhaps bridged to a secondary chain, the next step is maximizing its market presence.
Choosing Marketplaces Per Chain
-
Ethereum: OpenSea, LooksRare, Blur (for professional traders).
-
Polygon: OpenSea (in Polygon mode), Rarible.
-
Solana: Magic Eden, Solanart.
List your collection on the marketplace most favored by the community on that specific chain. For example, if you bridged to Solana, Magic Eden is a must.
Setting Price, Royalties, and Unlockable Content
-
Price: Maintain price consistency. The floor price for the original Ethereum NFT should reflect the floor price of the wrapped Polygon NFT, accounting for the difference in network fees and collector preference.
-
Royalties: Ensure that the contract deployed on the Secondary Chain (the wrapper contract) also honors the creator royalties. Most bridges support the transfer of this information, but always confirm it is properly set on the target marketplace. Royalties are set at the smart contract level.
-
Unlockable Content: Use the marketplace features to include extra files or benefits (high-res print file, access to a private Discord) that are only revealed to the current owner.
Marketing Cross-Chain NFTs
Highlight the cross-chain nature as a feature, not a complication. Emphasize:
-
Collector Choice: “Mint on Ethereum for max security, or bridge to Polygon for low fees and fast trades!”
-
Future-Proofing: Positioning the collection as a multi-chain native project shows a commitment to the evolving ecosystem.
Tools to Track Cross-Chain Ownership and Activity
Specialized portfolio tracking tools and NFT analytics platforms are emerging to track assets across multiple chains, often by aggregating data from chain explorers. Use these tools to monitor sales, floor price, and holder distribution across your primary and secondary chains.
Future of Cross-Chain Generative NFTs
The cross-chain narrative is quickly moving from a “nice-to-have” feature to a fundamental requirement for high-volume NFT projects.
-
Upcoming Platforms and Blockchain Interoperability Solutions: Next-generation bridging protocols, such as native features built into Layer 0 protocols, are aiming to make the bridging process an atomic swap—instant and near-trustless. Look for protocols focusing on generic message passing which allows not just tokens, but any smart contract data, to move between chains.
-
Role of Layer 2 Solutions and Sidechains: Layer 2s (like Arbitrum and Optimism) and Sidechains (like Polygon) are becoming the default scaling solution. Future generative collections may even choose a Layer 2 as their primary launch chain, relying on its speed and low cost while retaining the security of the underlying Layer 1 (Ethereum).
-
Trends in Generative Art and NFT Utility: The future of generative art is likely to be dynamic and interactive, with code that updates based on cross-chain events (e.g., the NFT image changing based on a DeFi position held on a different chain). This level of complexity requires robust and secure cross-chain data communication.
Final Thoughts
Minting a generative NFT collection is a major undertaking; expanding that mint to a cross-chain strategy adds complexity and risk, but the potential rewards—in terms of audience reach, transaction volume, and collector experience—are substantial.
The key to a successful cross-chain deployment is meticulous preparation and conservative execution. Recap the core principles:
-
Security First: Always prioritize the security of your smart contract and the audit status of the cross-chain bridge you use.
-
Decentralized Metadata: Your generative artwork’s metadata must be immutable, permanently hosted on IPFS or Arweave.
-
Clarity for Collectors: Be transparent about which version (original/wrapped) is being traded on which chain.
We strongly encourage you to encourage experimentation with small projects first. Use testnets for multiple full-cycle deployments, including bridging, before attempting a full mainnet launch. Take the time to master your chosen programming framework and contract logic. The future of NFTs is multi-chain, and by mastering this process, you position your generative collection at the cutting edge of digital art and blockchain technology.


