How to Migrate Tokens Across Networks
How to Migrate Tokens Across Networks: A Step-by-Step Guide
The evolution of blockchain technology has moved from a single-chain dominance to a vibrant, fragmented, and highly specialized multi-chain ecosystem. In the early days, Ethereum was the primary destination for decentralized applications (dApps) and tokens. Today, users regularly navigate between Ethereum, Binance Smart Chain (BSC), Polygon, Solana, Avalanche, and Layer 2 solutions like Arbitrum and Optimism.
As these ecosystems expand, the need to move assets between them has become a fundamental skill for any crypto participant. Token migration—the process of transferring the value of a digital asset from one blockchain to another—is the bridge that connects these isolated islands of liquidity. Whether you are chasing higher yields in a new DeFi protocol, looking for lower gas fees, or accessing a specific NFT marketplace, understanding how to migrate tokens safely is essential.
This guide provides a comprehensive deep dive into the mechanics, methods, and safety protocols of token migration. We will explore the technical underpinnings of cross-chain movement and provide actionable, step-by-step instructions to ensure your assets reach their destination securely.
Understanding Tokens and Blockchain Networks
To understand migration, one must first understand why it is necessary. Blockchains are, by design, closed systems. A transaction on the Ethereum network has no inherent way of communicating with the Solana network. They use different consensus mechanisms, different coding languages (such as Solidity vs. Rust), and different address formats.
What are Tokens?
Tokens are digital assets built on top of an existing blockchain. Unlike the native currency of a chain (like ETH on Ethereum or SOL on Solana), tokens are governed by smart contracts. To ensure compatibility within an ecosystem, developers follow specific standards:
-
ERC-20: The gold standard for fungible tokens on Ethereum.
-
BEP-20: The standard for Binance Smart Chain, highly compatible with Ethereum’s EVM.
-
SPL: The token standard for Solana, which uses a completely different architecture.
The Interoperability Gap
If you hold 100 USDC on Ethereum and try to send it directly to a Solana wallet address, the transaction will fail, or worse, the tokens will be permanently lost. This is because the Solana network does not recognize the Ethereum smart contract that governs your USDC. This lack of native communication creates a “siloed” economy.
Why Migrate?
Users migrate tokens for several strategic reasons:
-
Lower Fees: Moving assets from Ethereum Mainnet to a Layer 2 like Polygon or Arbitrum can reduce transaction costs from fifty dollars to a few cents.
-
Yield Farming: New protocols on emerging chains often offer higher incentives to attract liquidity.
-
Utility: A specific game or dApp might only exist on one specific network.
-
Staking and Governance: You may need to move a native token to its home chain to participate in voting or secure the network.
Common Challenges in Token Migration
While cross-chain technology has advanced, it remains one of the most complex and risky areas of decentralized finance. Beginners and experts alike face several hurdles.
Network Mismatch and Address Errors
The most common error is selecting the wrong destination network. For example, sending ETH to a BSC address without using a bridge or an exchange that supports the specific cross-chain mapping. If the receiving wallet does not support the source network, the funds are usually unrecoverable.
Gas Fees and Network Congestion
Migration is not free. You must pay gas fees on the source network to initiate the move and often a service fee to the bridge provider. During times of high congestion, these fees can spike, making the migration of small amounts of capital economically unviable.
Security Vulnerabilities
Cross-chain bridges are high-value targets for hackers. Because bridges often hold large amounts of locked collateral, they are prone to smart contract exploits. Historically, billions of dollars have been lost to bridge hacks. Additionally, the “phishing” industry is rampant; scammers create fake bridge websites that look identical to official ones to steal user private keys or seed phrases.
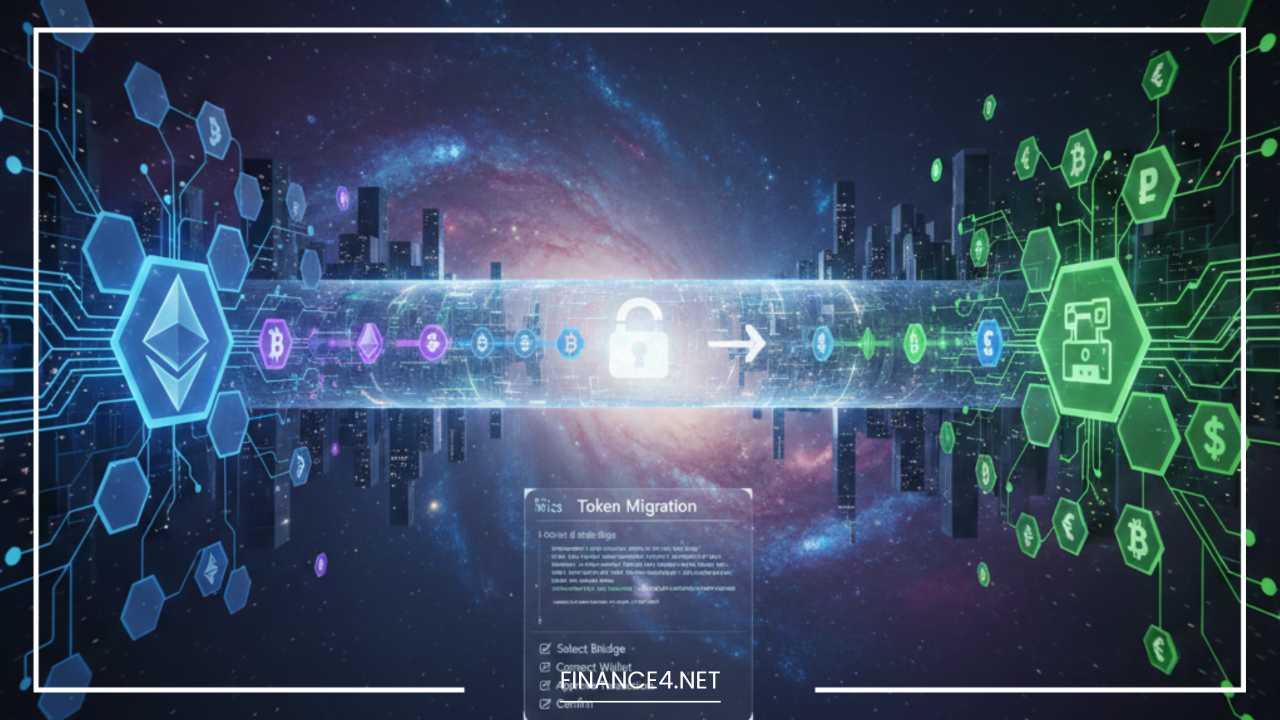
Methods of Token Migration
There is no single way to move tokens. The method you choose depends on your technical comfort level, the amount of money you are moving, and your tolerance for fees.
1. Blockchain Bridges
A bridge is a decentralized application that connects two blockchains. Most bridges operate on a “Lock-and-Mint” or “Burn-and-Mint” mechanism.
-
Lock-and-Mint: You lock your original tokens in a smart contract on Chain A, and the bridge issues an equivalent “wrapped” version of that token on Chain B.
-
Burn-and-Mint: The bridge burns the original token on Chain A (removing it from supply) and mints a native version of that same token on Chain B. This is generally more capital-efficient.
2. Centralized Exchanges (CEXs)
For many, using a CEX like Binance or Coinbase is the simplest route. You deposit your tokens into the exchange from one network and withdraw them to your private wallet using a different network. The exchange handles the backend “migration” for you.
3. Decentralized Exchanges (DEXs) & Cross-Chain Swaps
Platforms like Thorchain or LayerZero-based aggregators allow for “native-to-native” swaps. Instead of wrapping a token, these platforms use liquidity pools on both sides to facilitate a trade between native assets on different chains in a single transaction.
4. Wrapped Tokens
A wrapped token is a 1:1 representation of another cryptocurrency on a different chain. For example, Wrapped Bitcoin (WBTC) allows you to use the value of Bitcoin on the Ethereum network.
Step-by-Step Guide: Migrating Tokens Using a Bridge
This is the most common “on-chain” method. For this example, we will describe migrating USDC from Ethereum to Polygon using a standard web3 bridge.
Step 1: Selecting a Reliable Bridge
Choose a reputable bridge that supports your assets. Popular options include the Polygon PoS Bridge, Hop Protocol, Across, or Stargate Finance.
-
Tip: Always verify the URL via official sources like Coingecko or the project’s official Twitter to avoid phishing sites.
Step 2: Connecting Your Wallet
Navigate to the bridge website and click “Connect Wallet.” You will likely use a browser extension like MetaMask.
-
Ensure your wallet is set to the Source Network (the network where your tokens currently reside, e.g., Ethereum).
Step 3: Configuring the Transfer
In the bridge interface:
-
Select the From network (Ethereum).
-
Select the To network (Polygon).
-
Select the Token (USDC).
-
Enter the Amount.
Step 4: Token Approval
Before the bridge can move your tokens, you must grant the smart contract permission to spend them.
-
This is an “Approve” transaction.
-
Review the permission level; some bridges ask for “Infinite Approval.” It is safer to only approve the specific amount you are moving.
Step 5: Initiating the Migration
Once the approval is confirmed on-chain, click “Transfer” or “Bridge.” Your wallet will pop up with a second transaction request. This is the actual deposit into the bridge contract. Review the gas fee and confirm.
Step 6: The Waiting Period
Cross-chain transfers are not instantaneous. The bridge must wait for a certain number of “confirmations” on the source chain to ensure the transaction cannot be reversed. Once confirmed, the bridge release mechanism triggers on the destination chain. This can take anywhere from 5 to 30 minutes.
Step 7: Finalizing and Troubleshooting
Once the bridge reports the transfer is complete, switch your MetaMask network to the destination chain (Polygon).
-
If your tokens do not appear, you may need to “Import Token” and paste the specific contract address for that token on the destination network.
Step-by-Step Guide: Migrating Tokens via Centralized Exchanges
If you find bridges intimidating or if gas fees on the source network are prohibitively high, a Centralized Exchange (CEX) is an excellent alternative.
-
Deposit: Log into your exchange account. Go to “Deposit,” select the token (e.g., USDT), and choose the network you are sending from (e.g., Ethereum). Copy the deposit address and send your tokens there from your private wallet.
-
Verify Balance: Wait for the exchange to confirm the deposit and credit your account.
-
Withdraw: Go to the “Withdraw” section. Select the same token.
-
Select Destination Network: This is the crucial step. Paste your private wallet address and, in the “Network” dropdown, select the chain you want the tokens to arrive on (e.g., Arbitrum).
-
Confirm: Complete the exchange’s security checks (email/SMS/2FA). The exchange will then send the tokens to your wallet on the new network.
Pros: Often cheaper for small amounts; user-friendly interface.
Cons: Requires KYC; temporary loss of custody; exchange-specific withdrawal fees.
Step-by-Step Guide: Using Wrapped Tokens
Wrapping is a specific type of migration often used for assets that do not have their own smart contract capabilities (like Bitcoin).
-
Choose a Wrapper: For BTC to Ethereum, WBTC is the industry standard.
-
Use a Merchant or Bridge: Use a service like BitGo or a decentralized bridge like Threshold (tBTC).
-
Locking: You send your native BTC to a specific vault address managed by the wrapping service.
-
Minting: Once the vault confirms the receipt, an equivalent amount of the wrapped token is minted and sent to your Ethereum wallet.
-
Redeeming: To get your original asset back, you send the wrapped tokens back to the bridge to be “burned,” and the native asset is released from the vault to your native wallet.
Deep Dive: How Bridges Actually Work
To use bridges safely, it helps to understand the three main architectural models currently in use.
The Lock-and-Mint Model
This is the most traditional bridge style.
-
Source Side: Your tokens are locked in a “vault” smart contract.
-
Communication: An off-chain “Relayer” or “Oracle” sees this lock and sends a message to the destination chain.
-
Destination Side: A “Minter” contract creates a representation of the token (like ethUSDC) and sends it to you.
-
Risk: If the vault on the source side is hacked, the wrapped tokens on the destination side lose their backing and become worthless.
The Liquidity Pool (Swap) Model
This model does not create new tokens; it uses existing pools of native assets.
-
Mechanism: The bridge maintains a pool of USDC on Ethereum and a pool of USDC on Polygon. When you bridge, you add your USDC to the Ethereum pool and receive an equivalent amount from the Polygon pool.
-
Benefit: You receive “native” assets rather than “wrapped” assets, which are generally safer and more liquid.
-
Risk: If the pool on the destination side runs dry, your transaction may be delayed until more liquidity is added.
The Messaging Protocol Model (LayerZero, Wormhole)
These are not just bridges but “interoperability layers.”
-
They provide a standard way for different blockchains to talk to each other.
-
Instead of a central bridge, these protocols allow individual dApps to build their own cross-chain functionality. This is the foundation of the “Omnichain” future.
Security Best Practices
The decentralized nature of token migration means there is no “undo” button. Security must be your top priority.
1. Verify Bridge Integrity
Check the Total Value Locked (TVL) of a bridge on sites like L2BEAT or DefiLlama. A bridge with $1 billion in TVL is generally more battle-tested than one with $1 million. Also, check if the bridge has been audited by reputable firms like Trail of Bits or OpenZeppelin.
2. The “Test Transaction” Rule
Never move your entire balance in one go. If you are migrating $5,000, send $20 first. Ensure the $20 arrives safely on the destination chain and that you can see it in your wallet before sending the remaining $4,980. This protects you against simple errors like selecting the wrong network.
3. Revoking Approvals
When you use a bridge, you often give it permission to spend your tokens. If that bridge is ever hacked in the future, your wallet could be at risk even if you aren’t actively using the bridge.
-
Use tools like Revoke.cash or Etherscan Token Approval to cancel these permissions once your migration is complete.
4. Hardware Wallets
For large migrations, always use a hardware wallet (like Ledger or Trezor). This ensures that even if you are on a malicious website, the attacker cannot drain your funds without your physical confirmation on the device.
Costs and Fees: A Detailed Breakdown
Migration involves multiple layers of costs that can eat into your capital.
Source Chain Gas
Every migration starts with an on-chain transaction. On Ethereum, this can cost anywhere from $5 to $100 depending on network demand. This is often the largest single cost of migration.
Bridge Provider Fee
Bridges typically charge a small fee to maintain their infrastructure and pay for the gas required to send you the tokens on the destination chain. This is often a flat fee or a small percentage (0.05% to 0.1%).
Slippage and Price Impact
If you are using a liquidity-based bridge for a very large transaction, you might experience “slippage.” This happens when your trade is so large that it shifts the price of the asset within the bridge’s internal pool.
Destination Gas (The “Chicken and Egg” Problem)
A common issue for beginners is arriving on a new chain (like Polygon) with USDC but no MATIC (the native token) to pay for gas.
-
Solution: Many modern bridges have a “Gas Swap” feature that allows you to swap a small portion of your bridged tokens for the native gas token of the destination chain during the migration process.
Troubleshooting Common Errors
Even with careful planning, things can go wrong. Here is how to handle the most common issues:
“I don’t see my tokens in my wallet.”
Don’t panic. Check the transaction on a block explorer (like Etherscan or Polygonscan). If the transaction shows as “Success,” your tokens are likely there. You simply need to manually add the token’s contract address to your wallet’s display list.
“The transaction is stuck ‘Pending’ for hours.”
This usually happens if you set the gas fee too low. You can “Speed Up” the transaction in MetaMask by paying a slightly higher gas fee. If the bridge itself is stuck, contact the official support channel (usually Discord) with your transaction hash.
“I sent tokens to the wrong network.”
If you sent tokens from a CEX to a wallet on a network that the wallet doesn’t support, you may be able to recover them by importing your seed phrase into a wallet that does support that network. However, if you sent them to a contract address instead of a user address, they are likely lost forever.
Future of Token Migration: Toward “Chain Abstraction”
The current process of manually bridging tokens is considered a “user experience hurdle” that prevents mainstream adoption. The industry is moving toward a future called Chain Abstraction.
Intent-Based Bridges
In the near future, you won’t “bridge.” Instead, you will express an “intent.” You will tell your wallet: “I want to buy this NFT on Solana using my ETH on Ethereum.” The wallet will then find the fastest, cheapest path to migrate the funds and execute the purchase in the background.
Multi-Chain Wallets
Wallets are becoming smarter. Instead of forcing you to manually switch networks, next-generation wallets will show you a unified balance of all your assets across every chain. This makes the concept of “networks” invisible to the end-user.
Institutional Cross-Chain Rails
As of 2026, we are seeing massive growth in institutional-grade interoperability. Major financial institutions are building their own private-to-public bridges, allowing traditional assets (like tokenized T-bills) to move between bank-run blockchains and public networks like Ethereum securely.
Final Thoughts
Migrating tokens across networks is more than just a technical necessity; it is the act of participating in a truly global, interconnected financial system. By mastering the tools and techniques of cross-chain movement, you gain the freedom to move your capital to wherever it is most valued, most secure, or most productive.
However, the “wild west” nature of blockchain means that the burden of safety rests entirely on your shoulders. Always prioritize security over speed. Use reputable bridges, keep your software updated, and never share your seed phrase.
As the multi-chain world continues to evolve, these processes will become simpler and more integrated. Until then, use this guide as your roadmap to navigate the complex but rewarding landscape of cross-chain migration.


