Tutorial: Creating an NFT Collection
 by
by 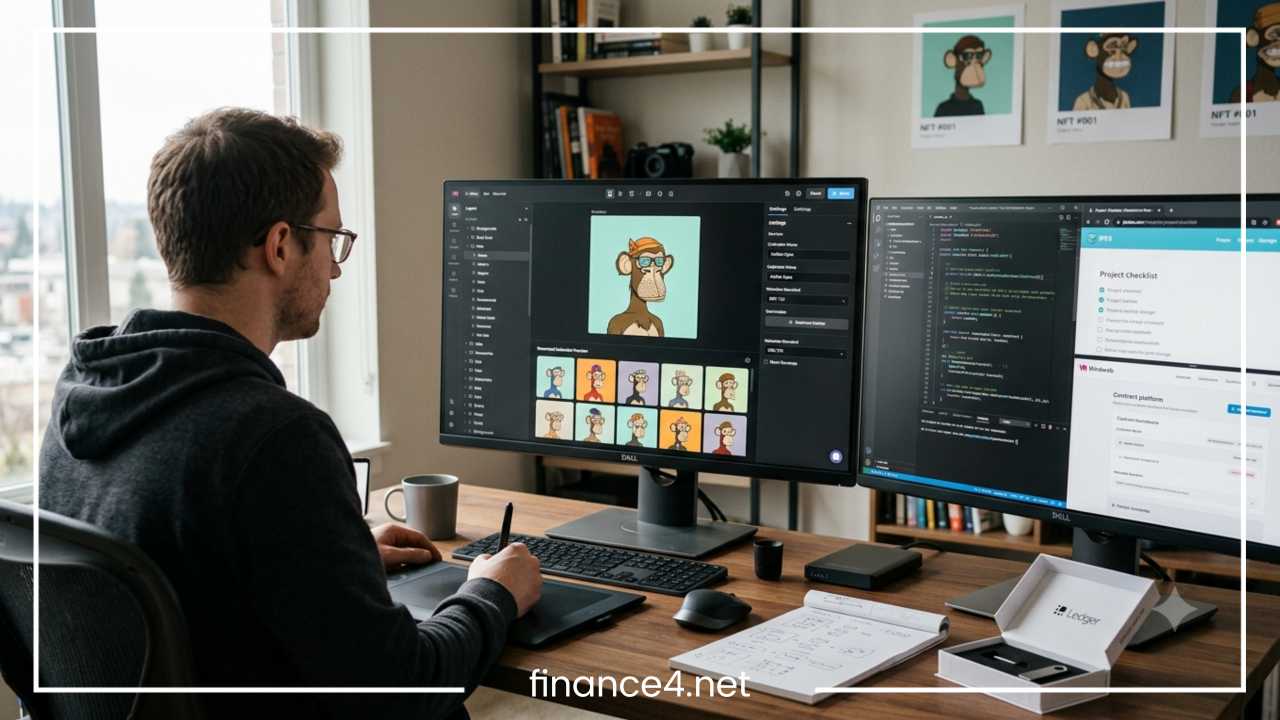
How to Create an NFT Collection: Step-by-Step Guide
Non-fungible tokens, widely recognized as NFTs, have transformed digital ownership across art, media, and digital collectibles. Beyond single digital art pieces, the broader Web3 ecosystem is driven by NFT collections. An NFT collection is a curated set of distinct digital assets released by an artist, brand, developer, or decentralized community. These assets operate on a blockchain network, ensuring verifiable scarcity, ownership history, provenance, and authenticity without relying on central intermediaries.
Creators, established global brands, indie game studios, and digital communities launch collections for diverse reasons. For individual artists and creators, collections offer global reach, direct monetization, and ongoing royalty potential without traditional art world gatekeepers. For businesses and digital native groups, collections serve as dynamic engagement tools, digital membership passes, brand expansion mechanisms, and foundational assets for digital ecosystems.
Launching a successful collection requires significantly more than drawing a few digital images or uploading files to an online marketplace. It demands a structured approach that combines artistic direction, creative strategy, blockchain technicality, secure data storage, user interface design, and long-term community management.
This comprehensive guide walks you through every stage of the lifecycle: defining your vision, crafting artwork, selecting a blockchain, deploying smart contracts, setting up decentralized storage, testing, launching, and managing your post-launch ecosystem.
What Is an NFT Collection?
An NFT collection is a series of unique digital tokens deployed under a single smart contract on a blockchain network. While a 1-of-1 NFT refers to a single, standalone artwork, a collection usually consists of dozens, hundreds, or thousands of individual pieces that share a cohesive visual theme, narrative framework, or utility structure.
Collections are generally categorized into two primary visual and structural formats:
Limited-Edition or 1-of-1 Sets consist of a small group of hand-drawn or individually curated digital pieces. Each asset in this type of collection is completely unique in composition, subject matter, and creation process.
Generative Collections are large-scale projects—often consisting of 1,000 to 10,000 tokens—created by algorithmically combining distinct visual traits like backgrounds, base characters, clothing, accessories, expressions, and color palettes.
NFT collections provide value to collectors and holders through multiple avenues:
| Collection Type | Core Value Driver | Typical Examples |
| Digital Artwork | Aesthetic appeal, artist reputation, visual narrative, aesthetic scarcity | Fine art series, generative canvas art, photography sets |
| Utility Tokens | Functional benefits, software access, real-world events, physical goods | Event tickets, software access passes, physical redeemables |
| Membership & Access | Exclusive community entry, networking, governance, insider updates | Creator clubs, private alpha groups, brand loyalty hubs |
| Gaming Assets | In-game functionality, interoperable gear, virtual identity | Virtual land, playable avatars, weapons, equipment |
Understanding this structure helps you align your creative outputs with technological requirements, minting mechanics, and community expectations.
Plan Your NFT Collection
Before writing smart contracts or generating images, you need a detailed plan. Starting without a strategy often leads to mismatched collection sizes, poor pricing models, or lack of audience interest.
Define the Concept and Story
Why does this collection exist, and what narrative does it communicate? A strong creative concept helps your project stand out in an active digital market. Decide whether your project focuses on rich storytelling, high-utility membership, artistic experimentation, brand extension, or interactive digital media.
Identify Your Target Audience
Determine who your ideal collectors are before building. Are you targeting Web3 digital art collectors, gamers, crypto-native investors, physical art enthusiasts, or traditional fans transitioning to digital assets? Your target audience influences your choice of blockchain, price point, visual style, communication channels, and technical complexity.
Decide Collection Size and Rarity Models
Choose a total supply that reflects market demand, artistic scope, and long-term community management capacity.
A supply of 100 to 500 items is ideal for intimate communities, premium high-touch utility, exclusive access clubs, or hand-drawn 1-of-1 art series.
A supply of 1,000 to 3,333 items represents a balanced mid-tier scale suitable for growing communities, specialized software utility, and mid-sized creator bases.
A supply of 5,000 to 10,000 items is the classic scale for large-scale generative avatar collections, gaming ecosystems, and broad consumer brand expansions.
Higher supply requires a significantly broader audience, higher marketing reach, and robust ongoing support infrastructure to maintain community momentum.
Establish Utility and Value Proposition
Determine what holders gain besides ownership of the token itself. Will holders receive commercial usage rights to their specific asset, access to private communication channels, future physical merchandise drops, physical event access, or discounts on software tools? Clearly state these benefits early in the planning process to set accurate expectations.
Set Your Financial Model and Budget
Calculate the operational costs involved before setting your public mint price:
Smart contract deployment fees and network gas costs.
Decentralized storage fees for permanent asset hosting.
Artwork creation, graphic design, and trait generation software expenses.
Website hosting, domain registration, and custom domain setup.
Security auditing, smart contract testing, and code review costs.
Set a realistic mint price based on these operational costs, current network gas dynamics, and the purchasing habits of your target demographic.
Create the NFT Artwork and Metadata
The artwork catches the eye, but the metadata gives an NFT its digital structure, identity, and blockchain readability. Preparing both components correctly ensures long-term display fidelity and marketplace compatibility.
Artwork Styles and Technical Preparation
Your artwork can span multiple media formats, including 2D digital illustrations, 3D animated models, pixel art, photography, video clips, or audio files. Ensure high image quality while keeping file sizes optimized. Uncompressed or excessively large files degrade user experience on marketplaces and increase decentralized storage requirements.
For 2D raster art, formats like PNG or WebP are recommended. For vector work, SVG or high-resolution exported PNGs are preferred. For animated or video assets, MP4 or WebM offer broad support. For 3D models, GLTF or GLB formats represent the industry standard.
For 2D square avatars, dimensions between 1000×1000 pixels and 2000×2000 pixels at a standard 72 DPI web resolution provide a clear balance between visual detail and file size optimization.
Designing Trait-Based Generative Collections
For generative collections, assets are assembled by layering separate art components on top of one another. To structure this effectively, divide your base character or object into distinct visual layers:
Layer 0 represents the Background.
Layer 1 represents the Base or Body structure.
Layer 2 represents Clothing or Outfits.
Layer 3 represents Eyes, Eyewear, or Expressions.
Layer 4 represents Mouths or Facial Accessories.
Layer 5 represents Headwear, Hair, or Overhead Items.
Ensure all traits fit the base model accurately across all potential combinations so overlapping components align seamlessly without visible visual errors or misalignment.
Establishing Trait Rarity and Asset Generation
Assign rarity weights to individual traits during the asset generation phase. For instance, a basic solid blue background might appear in 30 percent of the total collection, while a golden crown asset might only appear in 0.5 percent of generated items.
Creators use custom scripting or dedicated generative art generation software to compile these individual layer files into unique final images without creating unintended duplicate trait combinations.
Understanding NFT Metadata
Each NFT token points to a small digital document known as a JSON file. This document contains the token’s metadata, describing its name, description, asset link, and individual attributes.
A standardized ERC-721 metadata JSON file includes specific keys and attributes:
A name field containing the display title of the specific asset, such as Cosmic Voyager Number 001.
A description field providing background lore, project details, or asset context.
An image field containing the persistent URI address pointing to the visual asset hosted on decentralized storage.
An attributes array containing objects that define specific trait types and trait values, such as Background: Nebula Blue, Base: Android, Eyes: Laser Gold, and Headwear: Space Helmet.
Organize your output files carefully during generation. Keep all generated final images in one numbered folder and matching JSON metadata files in a separate folder using matching numerical file names.
Choose a Blockchain for Your NFT Collection
Selecting the right blockchain ecosystem affects transaction speeds, minting costs, target audience reach, wallet compatibility, and secondary marketplace visibility.
| Factor | Ethereum | Polygon | Solana | Base |
| Transaction Fees (Gas) | High to Variable | Very Low | Extremely Low | Very Low |
| Transaction Speed | Moderate | Fast | Extremely Fast | Fast |
| Market Liquidity | Highest | Moderate to High | High | Rapidly Expanding |
| Ecosystem Maturity | Gold Standard | High | High | Rapidly Growing |
| Primary Token Standard | ERC-721 / ERC-1155 | ERC-721 / ERC-1155 | Metaplex / Token-2022 | ERC-721 / ERC-1155 |
Key Decision Criteria
Target Collector Base: If your target market consists of high-end fine art collectors or established crypto-native buyers, Ethereum remains highly popular due to its long security track record and massive liquidity pools.
Minting and Gas Costs: If you want collectors to mint assets at minimal friction and negligible fee overhead, Layer-2 networks like Polygon and Base, or alternative Layer-1 networks like Solana, offer fast throughput and extremely low transaction fees.
Tooling and Infrastructure: Ensure your chosen network is supported by major NFT marketplaces, wallet extensions, indexing services, and block explorers.
Set Up a Crypto Wallet
A crypto wallet serves two critical purposes: it acts as your administrative key to deploy smart contracts to the blockchain and manages the funds received from mint sales and secondary royalty distributions.
Selecting a Compatible Wallet
For Ethereum Virtual Machine (EVM) compatible networks like Ethereum, Polygon, and Base, popular software wallet options include MetaMask, Coinbase Wallet, and Rainbow.
For the Solana ecosystem, specialized wallet options include Phantom and Solflare.
Installation and Setup Steps
Download the official wallet browser extension or mobile application directly from verified source pages.
Select the option to create a new wallet.
Establish a strong, unique local password for device access.
Carefully record your Secret Recovery Phrase, also known as a Seed Phrase, which typically consists of 12 or 24 ordered words.
Wallet Security Rules
Never reveal your seed phrase or private keys to anyone under any circumstances.
Write the seed phrase down on physical paper or store it in an offline vault. Avoid saving it in unencrypted cloud documents, digital notes, screenshots, or email drafts.
Beware of phishing websites impersonating wallet providers, NFT marketplaces, or project launch pages.
Consider using a hardware wallet, such as a Ledger or Trezor, connected to your software wallet interface when managing contract deployment and administrative contract permissions.
Fund your administrative wallet with the target network’s native currency, such as ETH, POL, or SOL, to cover smart contract deployment and initial gas fees.
Create an NFT Smart Contract
The smart contract is the self-executing code that governs your collection on the blockchain. It dictates token minting rules, total supply caps, transfer mechanisms, owner administrative permissions, and financial payout destinations.
Smart Contract Standards
ERC-721 is the foundational open standard for non-fungible tokens on EVM networks. Each token within an ERC-721 contract is distinct and tracked individually on-chain.
ERC-721A is an optimized extension of the standard ERC-721 contract. Designed specifically for batch minting, it significantly reduces gas consumption when a collector mints multiple tokens within a single transaction.
ERC-1155 is a multi-token standard that supports both fungible assets and non-fungible tokens within a single deployed contract. It is widely used in gaming ecosystems, item collections, and multi-edition passes.
Core Smart Contract Components
A standard collection contract contains several predefined variables and administrative control functions:
Collection Name and Symbol parameters, such as Name: Cosmic Voyagers, Symbol: COSMIC.
Max Supply, an unchangeable integer variable that limits the absolute maximum number of tokens that can ever be minted by the contract.
Base URI, the persistent web address string pointing to your decentralized metadata directory.
Mint Price, the exact amount of native network currency required to mint a single token.
Max Mint Per Wallet or Max Mint Per Transaction, which limits hoarding behavior and helps ensure wider token distribution.
Withdraw Function, an owner-only function that transfers accumulated funds from the smart contract address to the creator’s personal or multisig treasury wallet.
Deployment Options: No-Code Platforms vs. Custom Development
No-code launchpads and platforms allow creators to configure, test, and deploy smart contracts through graphical interfaces without writing code. Pros include simple setup, minimal technical barriers, and pre-audited contract templates. Cons include reduced customization options and potential platform fee percentages.
Custom smart contract development involves writing custom Solidity or Rust code using development frameworks like Hardhat or Foundry. Pros include complete control over custom mechanics, such as dynamic metadata, complex staking mechanisms, or custom allowlist logic. Cons include requiring advanced programming expertise and mandatory third-party security audits.
Upload Your NFT Files and Metadata
NFT assets must be stored on reliable, permanent, and decentralized infrastructure. Storing digital media files on traditional centralized web servers creates a single point of failure; if the server goes offline or the domain expires, the NFT metadata and media render as broken links.
Decentralized Storage: IPFS and Arweave
Decentralized networks solve centralized storage risks through content addressing rather than location addressing.
The InterPlanetary File System (IPFS) assigns every uploaded file a unique Content Identifier (CID) based on its exact cryptographic hash. As long as the hash remains identical, the content remains verifiable regardless of where it is hosted. Dedicated pinning services keep IPFS content permanently online and accessible via public gateways.
Arweave is a pay-once, store-forever decentralized storage network designed specifically for permanent archival data storage, making it another popular choice for digital media assets.
Step-by-Step Upload Flow
Upload the master folder containing all final raw media files, ordered numerically, directly to your decentralized storage pinning provider.
Copy the resulting Media Folder CID once the upload process completes.
Update your local JSON metadata files by setting the image attribute key to point directly to the media directory CID path.
Upload the updated JSON metadata folder to the pinning service to obtain your final Metadata Folder CID.
Pass the final metadata URI string into your deployed smart contract using the setBaseURI administrative function.
Mint Your NFT Collection
Minting is the formal process of publishing digital assets to the blockchain for the first time, converting unminted artwork into active on-chain tokens.
Minting Models
In traditional pre-minting, the project creator mints all tokens directly into their own administrative wallet beforehand, covering the upfront gas costs, and subsequently lists the individual tokens for sale on secondary marketplaces. This approach suits small fine art releases or limited 1-of-1 series.
In on-demand public minting, the creator deploys an unminted smart contract connected to a public website interface. Individual collectors pay the designated mint price plus network gas fees to generate tokens directly into their own wallets on demand.
In lazy minting, the asset is configured and listed on a marketplace, but it is not formally written to the blockchain until a buyer purchases it. The buyer covers the initial minting gas fee upon purchase, eliminating upfront deployment and minting costs for the creator.
The public minting execution flow follows a structured sequence. The collector connects their wallet to the launch website. Next, the user selects the desired mint quantity and clicks the mint command button. The user then approves the transaction details, mint price, and network gas fee within their wallet interface. The smart contract validates the payment and supply parameters on-chain. Finally, the newly created NFT tokens are minted directly into the user’s wallet address.
Whitelists and Allowlists
To reward early community members, avoid extreme network congestion, and mitigate high gas fee spikes during launch, creators frequently divide sales into distinct phases:
The Allowlist or Presale Phase is reserved for early community members who receive guaranteed or discounted minting access. This phase uses cryptographic proof mechanisms, such as Merkle trees or signature-based verification, to validate eligible wallet addresses efficiently.
The Public Sale Phase opens to all general Web3 users once the presale window closes or fills its allocated supply quota.
Test Everything Before Launch
Launching a contract directly to a live mainnet without extensive testing exposes creators to contract bugs, financial exploits, broken metadata links, and execution failures. Test thoroughly using blockchain test networks before going live.
Testnet Environment Options
For Ethereum and EVM testing, networks like Sepolia or Amoy provide simulated environments where developers use test tokens without real monetary value.
For the Solana ecosystem, Devnet serves as the primary testing environment for smart contract programs.
Comprehensive Pre-Launch Testing Grid
| Functional Area | Verification Step | Objective |
| Smart Contract | Verify deployment on testnet block explorer | Confirm contract deploys cleanly without bytecode errors |
| Supply Limits | Attempt to mint beyond the maximum supply cap | Ensure the contract strictly enforces configured supply bounds |
| Pricing Rules | Test public and allowlist mint pricing parameters | Validate that incorrect payment values are rejected by contract |
| Metadata Loading | Verify traits and media render on testnet marketplaces | Confirm images, titles, and trait values load accurately |
| Withdrawal Controls | Execute contract withdrawal to administrative wallet | Verify funds transfer safely to designated treasury addresses |
| Security Controls | Test mint pausing and unpausing functions | Ensure administrative emergency controls function as expected |
Always test interaction flows using multiple separate test wallet addresses to ensure public minting, allowlist limits, and wallet caps behave exactly as intended.
Build an NFT Minting Website
Your launch website serves as the primary hub for your project, providing brand context, roadmap information, team backgrounds, and the direct user interface for wallet connection and token minting.
Core Website Components
The Hero Section contains clear visual previews of the artwork, the official collection title, project tagline, and a prominent wallet connection button.
The Mint Module displays a real-time counter showing minted tokens relative to total supply, mint quantity increment selectors, price calculations, and mint execution buttons.
The About and Lore Section provides clear background details regarding the narrative, creative origin, creator credentials, and overarching mission.
The Trait Gallery features an interactive visual preview component highlighting individual trait layers, rarity distributions, and aesthetic variations.
The Project Scope Section outlines future goals, utility deliverables, community milestones, and strategic plans.
The Official Links Section provides explicit, verified links to smart contract addresses, social communication channels, documentation, and marketplace pages.
Technical Frontend Architecture
Modern minting websites are built using web frameworks like Next.js or React, coupled with specialized Web3 communication libraries:
Wagmi, Viem, or Ethers.js act as communication libraries that handle reading smart contract data and writing mint transactions to the blockchain.
Web3Modal, RainbowKit, or AppKit provide modular UI components that streamline multi-wallet connection flows for desktop and mobile users.
Keep frontend code clean, lightweight, and performant to prevent interface lag or connection timeouts during high-traffic launch events.
Launch and Market Your NFT Collection
Even exceptional artwork and secure smart contracts require strategic outreach to attract collectors. Sustainable community building works far better than short-term hype tactics.
Strategic Outreach Channels
X, formerly known as Twitter, serves as the central hub for Web3 announcements, creator audio spaces, art reveals, and project updates.
Discord provides a dedicated community hub for structured discussion threads, support ticketing, allowlist verification tracking, and real-time event hosting.
Decentralized Social Networks offer emerging platforms for engaging directly with crypto-native audiences and digital creators.
Marketing Best Practices
Share behind-the-scenes creation videos, individual trait spotlights, and narrative lore posts well in advance of your launch date to build organic interest.
Partner with established Web3 communities, digital art collectives, or complementary projects to offer cross-community allowlist spots and collaborative events.
Host live audio streams, question-and-answer sessions, and creative competitions to build authentic relationships with early supporters.
Unethical Marketing Practices to Avoid
Artificially inflating interest through fake scarcity claims, false supply figures, or manufactured urgency.
Buying fake social media followers, automated engagement bots, or inflated activity metrics.
Making promises of financial returns, speculative profit guarantees, or treating digital tokens as investment securities.
Engaging in wash trading, artificial volume manipulation, or self-dealing to create false secondary market metrics.
Be transparent about your project’s scope, team background, development timelines, and realistic goals.
Manage the Collection After Launch
Launching your collection is the beginning of your project’s lifecycle, not the final step. Active ongoing management helps maintain collector trust, secondary market liquidity, and project momentum.
Post-Launch Priorities
Smart Contract Management
If your project utilizes a delayed reveal mechanic, update the base URI parameter within your contract settings to point to the final metadata directory containing actual asset traits and images. Once minting completes entirely, consider locking or pausing administrative variables where appropriate to ensure contract permanence.
Secondary Marketplace Configuration
Claim and configure your official project profiles on major secondary marketplaces:
Provide detailed collection descriptions, official banner images, and verified profile graphics.
Configure creator earnings percentages, commonly known as royalties, in accordance with platform policies and current network standards.
Verify smart contract ownership signatures to secure official verification badges and protect collectors from fake counterfeit collections.
Delivery on Utility Commitments
Execute the plans outlined in your project scope, such as delivering physical merchandise, granting access to private communication channels, launching software tools, or distributing physical prints to verified holders.
Community Security and Support
Help collectors protect their assets by maintaining prominent security advisories within your community channels. Consistently remind your community that project administrators will never send direct messages first, ask for private seed phrases, or request emergency token transfers.
NFT Collection Launch Checklist
Use this practical reference checklist as you move through each phase of your collection launch.
Phase 1: Planning and Artwork
Finalize creative concept, project scope, utility models, and total token supply.
Design base models and all individual trait layers across required visual categories.
Generate final image sets and confirm zero alignment errors or layer overlaps.
Create, format, and validate metadata JSON files for all generated items.
Phase 2: Technical Setup and Storage
Upload media assets to IPFS or Arweave and obtain persistent media directory CIDs.
Generate final metadata JSON files with updated media links and obtain metadata directory CIDs.
Select the target blockchain network based on fees, speed, and audience requirements.
Write, configure, or generate smart contract code with appropriate mint rules and supply limits.
Deploy the contract to a testnet environment and run full transaction tests.
Phase 3: Infrastructure and Marketing
Build and deploy the project website featuring secure wallet connection modules.
Establish official social communication channels and community security guidelines.
Execute community outreach campaigns, cross-project collaborations, and allowlist distributions.
Verify metadata and media rendering on testnet marketplace explorers.
Phase 4: Launch and Post-Launch
Deploy finalized smart contract to mainnet and fund administrative addresses.
Update contract base URI and enable presale or public minting access phases.
Confirm minting execution and verify on-chain transaction metrics.
Claim official secondary marketplace profiles, set creator settings, and verify contract ownership.
Maintain active community management, deliver promised utility, and issue project updates.
Final Thoughts
Creating an NFT collection requires a balance of artistic expression, software engineering, decentralized storage setup, website development, and long-term community leadership.
Success in the Web3 space comes from executing each phase with care—from designing clean trait combinations and writing secure smart contracts to setting up reliable storage and maintaining open, transparent communication with collectors.
Focus on building long-term value, keeping your technological infrastructure secure, and serving your community. With a clear strategy, reliable technical tools, and a structured launch process, you can transform your creative vision into an active Web3 collection.
Frequently Asked Questions (FAQ)
How much does it cost to create a 10,000 NFT collection?
The cost to create a 10,000 NFT collection varies depending on the blockchain network and generation tools used. Deploying a smart contract on Ethereum can cost anywhere from $50 to over $300 in gas fees depending on network congestion, while deployment on Polygon, Solana, or Base often costs less than $5. If using no-code NFT collection generators or hiring smart contract developers and 3D/2D digital artists, additional setup costs can range from $100 to $5,000+.
How to create an NFT collection without coding?
You can create an NFT collection without writing code by using no-code Web3 launchpads and generative art tools. Software like NFT-Inator or Bueno lets you upload layer traits (backgrounds, bodies, accessories) and automatically generate image files and metadata JSON files. Platforms like Thirdweb, Manifold, or OpenSea Studio allow you to deploy smart contracts and set up minting pages using drag-and-drop interfaces.
What is the best blockchain to create an NFT collection?
The best blockchain for an NFT collection depends on your budget and audience. Ethereum is the standard for high-value artwork due to maximum liquidity and collector trust. Polygon and Base (Layer-2 networks) offer high speed and low gas fees while maintaining EVM compatibility. Solana is popular for low-cost, high-speed minting and large gaming or generative avatar communities.
How do NFT royalties work for creators?
NFT royalties allow creators to earn a percentage of secondary market sales every time a token is resold on a marketplace. Royalty percentages typically range between 2.5% and 10%. Creators configure royalties within their smart contracts or via marketplace standards (such as ERC-2981), directing a portion of each sale automatically back to the creator’s wallet address.
What is the difference between lazy minting and standard minting?
Standard minting writes token data directly to the blockchain as soon as the collection launches, requiring the creator or collector to pay gas fees immediately. Lazy minting defers on-chain writing until a buyer actually purchases the asset. The buyer covers the gas fee during checkout, allowing creators to list their NFT collections without paying upfront minting fees.
How do I store NFT artwork permanently using IPFS?
To keep NFT artwork permanently accessible, store files on the InterPlanetary File System (IPFS) or Arweave rather than centralized servers. IPFS assigns every file a unique Content Identifier (CID) based on its cryptographic hash. Using pinning services like Pinata or NFT.Storage ensures your media and JSON metadata files stay online and linked securely to your smart contract.