How to Generate NFT Art
 by
by 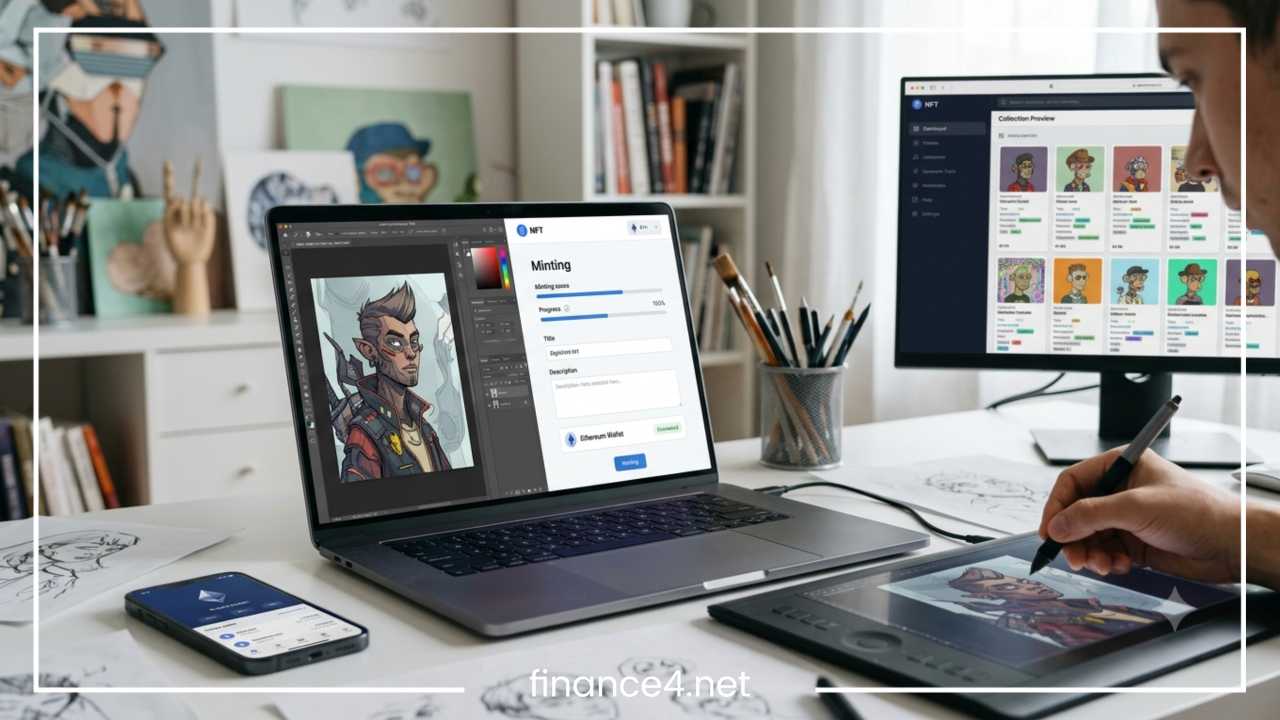
How to Generate NFT Art: Step-by-Step Beginner Guide
Non-fungible tokens, commonly known as NFTs, have transformed how creators publish, track, and commercialize digital assets across global markets. Digital artists, traditional painters, graphic designers, photographers, 3D illustrators, and creative hobbyists now possess an accessible digital framework to establish clear, unalterable ownership over their digital creations. Learning how to generate NFT art allows you to convert digital files—ranging from digital illustrations and 3D renders to AI-generated compositions and video loops—into unique, tradeable digital assets backed by cryptographic proof.
Many creators enter the space believing that generating digital artwork automatically creates an NFT. However, creating the digital file and turning that file into an NFT are two distinct steps that require different tools and knowledge. Generating artwork involves standard design software, digital painting tools, traditional photography, or programmatic algorithms. Converting that artwork into an NFT involves writing cryptographic data to a blockchain network through a process known as minting.
Understanding this division is essential for anyone who wants to build a successful presence in the digital asset space. When you mint artwork, you are not merely uploading a graphic to the web; you are creating a permanent cryptographic record that verifies provenance, tracks ownership history, and enables seamless peer-to-peer transfers across decentralized networks.
This comprehensive guide breaks down the entire lifecycle of NFT art creation into practical, easy-to-follow steps. You will learn how to conceptualize your artwork, select design tools, optimize media formats, configure a secure digital wallet, choose an optimal blockchain, complete the minting process step by step, manage your digital metadata, and present your finished work to prospective collectors.
What Is NFT Art?
NFT art refers to digital artwork tied to a unique cryptographic token registered on a distributed blockchain ledger. Unlike standard digital files on the internet—which can be copied, downloaded, shared, or screenshot infinitely without any inherent distinction between the original and a copy—an NFT acts as an immutable, tamper-proof digital certificate of authenticity and ownership.
When an artist attaches artwork to an NFT, the underlying blockchain records the token’s origin, creation timestamp, creator address, current owner, and complete transaction history. While anyone on the internet can still view, download, or right-click and save the visual image file attached to an NFT, only the wallet holding the specific token possesses true, verifiable digital ownership acknowledged by the network.
To navigate the digital asset space effectively, every beginner must become familiar with several foundational terms:
| Term | Detailed Definition |
| NFT | Non-Fungible Token; a unique cryptographic asset whose ownership and authenticity are verified via blockchain technology. |
| Blockchain | A decentralized, distributed digital ledger that securely records transactions across a peer-to-peer computer network. |
| Wallet | A digital software application or hardware device used to manage cryptographic keys, sign transactions, and hold digital assets. |
| Minting | The technical process of publishing a digital file onto a blockchain network so that it becomes a distinct cryptographic token. |
| Gas Fees | Transaction processing fees paid to network validators or miners to execute operations on a blockchain. |
| Marketplace | A web application or platform where creators and collectors buy, sell, mint, and auction digital assets. |
| Smart Contract | Self-executing code stored directly on the blockchain that dictates how tokens transfer, operate, and distribute royalties. |
The distinction between fungible and non-fungible assets is central to this technology. Fungible assets, such as government currencies or standard cryptocurrencies like Bitcoin, are completely interchangeable; one unit holds the exact same financial value as another unit. Non-fungible assets, by contrast, possess unique attributes and identifiers that render them completely distinct and non-interchangeable. An NFT artwork cannot be directly replaced on a one-to-one basis by another token, because each token represents a distinct asset with its own history, traits, and provenance.
How NFT Art Is Created
Before touching a blockchain or setting up technical infrastructure, every creator should understand the high-level creation workflow. The lifecycle of an NFT project follows a logical progression from initial ideation to secondary market management:
-
Developing the artwork concept and visual narrative
-
Generating or rendering the primary digital visual assets
-
Formatting and optimizing files for web display and permanent storage
-
Preparing comprehensive metadata and trait structures
-
Setting up and securing a compatible digital cryptocurrency wallet
-
Choosing the right blockchain network based on project goals
-
Minting the digital artwork onto the chosen blockchain
-
Listing the asset for sale on a specialized marketplace
Digital artwork generation generally falls into four main categories, depending on your skills, creative style, and intended project scale:
Manually Created Artwork
This category encompasses original digital artwork created through traditional hand-drawn techniques or digital illustration tools. Illustrators, graphic designers, vector artists, and digital painters use tablets, styluses, and specialized visual software to draw assets from scratch. This approach relies entirely on manual skill, individual artistry, and traditional creative craftsmanship.
AI-Generated Artwork
Artificial intelligence engines generate complex visual compositions based on natural language text prompts provided by the creator. Artists carefully craft, refine, and iterate on text descriptions to produce unique visual styles, blending distinct artistic movements, lighting effects, and subject matters through machine learning models.
Generative NFT Collections
Generative collections consist of thousands of distinct items created programmatically by combining individual trait layers. An artist draws multiple variations of base bodies, backgrounds, facial expressions, hats, clothing items, and accessories. Software scripts then automatically stack and merge these layers into thousands of unique combinations, assigning calculated rarity tiers to each asset.
Media Conversions and Physical Art
Physical artworks, traditional oil paintings, analog photography, sculptured media, video recordings, and audio tracks can be digitized using high-resolution scanners, professional cameras, or audio mastering software. Once converted into digital files, these physical conversions can be tokenized as digital certificates representing physical items or hybrid physical-digital artworks.
Choose Your NFT Art Concept and Style
A clear visual and thematic concept is essential for standing out in a competitive digital market. Before opening drawing software or drafting AI prompts, take time to define your core narrative, target audience, artistic medium, color palette, and overall presentation structure.
Defining Your Target Audience and Art Style
Consider who will appreciate and collect your work. Fine art collectors, digital photography enthusiasts, and institutional buyers frequently seek complex 3D renders, physical-to-digital conversions, high-concept digital paintings, or narrative-driven illustrations. By contrast, online communities, avatar collectors, and web enthusiasts often favor stylized vector characters, pixel art, minimalist designs, or cohesive generative collections designed for social media profiles.
Establishing a consistent visual identity helps collectors identify your work across different platforms and marketplaces. Whether you choose dark atmospheric surrealism, bright pastel pop art, technical isometric drafting, or vintage low-poly 3D design, maintaining stylistic coherence strengthens your creative brand over time.
Single NFT versus Collection Releases
Decide early whether your project will take the form of individual 1-of-1 releases or an item collection:
-
1-of-1 NFTs: These are standalone, fully custom artworks packed with detail and narrative intent. They are best suited for fine artists, painters, animators, and photographers who prefer producing single high-value pieces that sell via curated auctions or private collections.
-
NFT Collections: These are structured series ranging from 50 items to 10,000 items that share a unified theme, visual framework, or character template. Collections rely on variation, community engagement, and trait rarity dynamics to appeal to broader collector bases.
Example: Refining a Vague Concept
To build a successful collection, transform generic artistic ideas into specific, actionable creative frameworks:
-
Vague Idea: “I want to make cool digital robot drawings.”
-
Refined Concept: “A 2,500-piece collection of retro-futuristic 1980s isometric robot avatars featuring 6 distinct metallic finishes, 12 glowing visor colors, 8 shoulder attachments, and 4 background garage settings, rendered in a neon synthwave color palette.”
Create Your NFT Artwork
Once your concept, visual style, and format are established, you can begin generating the actual digital artwork using your chosen creation methodology.
Traditional and Digital Creation Methods
Digital illustrators and traditional painters transitioning to the digital space rely on software to produce high-resolution master files. Tools like Adobe Photoshop, Procreate, Corel Painter, and Clip Studio Paint offer extensive brush engines, layer systems, color management, and precision input controls.
For vector graphics that scale cleanly across any display size, applications like Adobe Illustrator and Affinity Designer provide path-based illustration tools ideal for clean graphic designs, logo-style art, and pop-art visuals.
If you work in 3D modeling, software like Blender, Cinema 4D, Maya, or ZBrush allows you to sculpt intricate characters, build realistic environments, apply complex textures, and set up dynamic lighting systems. 3D artwork can be exported as high-resolution static renders, animated MP4 video loops, or interactive 3D model files. Always maintain master project files with full layer histories in case adjustments are required during the preparation phase.
AI-Generated NFT Art
Creating art with generative artificial intelligence requires learning how to construct precise, effective text prompts to guide machine learning models toward a specific vision. To produce high-quality AI artwork:
-
Draft Descriptive Prompts: Avoid brief, ambiguous prompts like “cool dragon.” Instead, supply specific descriptors detailing medium, camera angles, lighting conditions, artistic movements, and color schemes (for example, “An intricate mechanical dragon constructed from polished brass and exposed copper gears, sitting atop a mountain peak during golden hour sunset, cinematic lighting, octane render, 8k resolution”).
-
Iterate and Refine: Generate multiple batches of images, modify prompt keywords, adjust seed parameters, and utilize regional prompt controls to refine specific details of the composition.
-
Edit and Upscale: AI engines frequently output base images at standard web resolutions that may show noise or blurring when scaled up. Use graphics software or dedicated image upscaling utilities to increase pixel density, clean up unwanted visual artifacts, adjust color curves, and sharpen key focal points.
-
Verify Commercial Licensing: Carefully review the terms of service for any AI platform you use. Ensure that the specific subscription tier or licensing model grants you full commercial usage rights to tokenize, market, and monetize the resulting images.
Generative Art Collections
Generative collections rely on creating individual visual components that stack systematically on top of each other. Building a generative trait collection involves three primary steps:
-
Establish a standardized canvas dimension (such as 2500×2500 pixels) across all project files to guarantee alignment.
-
Draw base components across organized asset layers: Backgrounds, Base Bodies, Outfits, Mouths, Eyes, Headwear, and Foreground Accessories. Save each trait as a transparent PNG file.
-
Use asset compilation scripts or generative tools to automatically merge trait layers according to predetermined rules, generating unique outputs and corresponding rarity metadata files.
Layer Stacking Sequence:
Background Layer ---> (Bottom Base)
Base Body Layer ---> (Layer 2)
Clothing Layer ---> (Layer 3)
Facial Traits Layer ---> (Layer 4)
Headwear Layer ---> (Layer 5)
Foreground Layer ---> (Top Overlay)
Supported Media File Formats
Select the appropriate file format for your chosen artistic medium, keeping marketplace compatibility and file size constraints in mind:
| Format | Description | Primary Use Case |
| PNG | Portable Network Graphics; lossless raster image format supporting transparency. | Static 2D digital art, character traits, vector exports, pixel art. |
| JPG / JPEG | Joint Photographic Experts Group; lossy compressed raster format. | High-detail digital photography, complex digital paintings. |
| GIF | Graphics Interchange Format; supports simple frame-by-frame animations. | Short animated loops, retro pixel art animations. |
| SVG | Scalable Vector Graphics; XML-based vector image format. | Scalable graphics, generative on-chain vector art. |
| MP4 | MPEG-4 Part 14; compressed digital video container format. | Animated 3D loops, motion graphics, audio-visual compositions. |
| WEBM | Open media file format designed for royalty-free web video. | Lightweight web video loops, animated vector displays. |
Prepare Your Artwork for NFT Minting
Proper file preparation ensures your artwork renders clearly across different marketplaces, wallet apps, virtual galleries, and high-resolution displays without performance lag or visual distortion.
Resolution, Dimensions, and Technical Specifications
-
Canvas Resolution: Work with high-resolution master canvases from the start. For square static images, aim for dimensions between 2000×2000 pixels and 4000×4000 pixels to ensure crisp display on high-density screens.
-
Aspect Ratio Consistency: Maintain identical dimensions and aspect ratios across all items within a collection (such as 1:1 square, 4:5 vertical portrait, or 16:9 widescreen). Consistent dimensions prevent irregular cropping when assets appear alongside each other in collection grids.
-
File Size Management: While high quality is critical, excessively large file sizes can slow loading times on marketplace pages. Keep static image files under 20MB whenever possible. For heavy video assets or 3D animations, compress files to remain well under platform limits (typically between 50MB and 100MB).
-
Preview Thumbnails: When minting heavy video files (MP4) or complex 3D objects, create a lightweight static PNG thumbnail or compressed GIF preview card. Marketplaces use these preview assets to load grid views quickly before loading full media files.
File Naming Conventions and Backups
Establish a disciplined, organized system for naming files prior to upload. Avoid generic names like image1.png or final_art_v2.jpg. Use structured naming conventions such as ProjectName_ItemNumber_Title.png (for example, CyberBots_0001_ApexSentinel.png).
Maintain redundant backup copies of all original project files, export renders, trait layers, and master metadata files across multiple physical storage drives and secure encrypted cloud services. If decentralized hosting links ever need verification or re-indexing, having immediate access to your uncompressed original master files is invaluable.
Choose a Blockchain for Your NFT
The blockchain network you choose directly influences your minting expenses, transaction processing speeds, ecological footprint, buyer audience, wallet compatibility, and secondary market ecosystem.
Ethereum
Ethereum is widely recognized as the pioneer network for NFTs and remains the market leader for high-value sales, fine art releases, and major cultural projects.
-
Strengths: Unrivaled market liquidity, established institutional collector base, widespread software integration, and maximum historical stability.
-
Considerations: Gas fees can fluctuate significantly during periods of heavy network congestion, occasionally making low-priced artwork unfeasible to mint directly on the main chain.
Polygon
Polygon functions as a Layer-2 scaling network for Ethereum, delivering near-instant transactions at fractions of a cent while maintaining compatibility with the Ethereum ecosystem.
-
Strengths: Minimal gas fees, fast confirmation times, eco-friendly operational footprint, and full compatibility with Ethereum-based wallet tools.
-
Considerations: Lower average secondary trading volumes and lower overall liquidity compared to the primary Ethereum mainnet.
Solana
Solana is a high-performance Layer-1 blockchain built specifically for speed and high transaction throughput, making it popular for low-cost generative collections and interactive digital assets.
-
Strengths: Extremely rapid block times, near-zero transaction fees, and a dedicated, highly active creator community.
-
Considerations: Operates on an entirely separate network infrastructure from Ethereum, requiring creators and collectors to use dedicated Solana wallet software.
Base
Base is a Layer-2 blockchain network that combines low transaction expenses with direct access to centralized exchange ecosystems and consumer wallet onboarding pipelines.
-
Strengths: Rapid transaction speeds, low gas costs, strong builder backing, and streamlined onboarding for mainstream users.
-
Considerations: A newer ecosystem that continues to build out its specialized marketplace options compared to long-standing networks.
Set Up a Crypto Wallet
A crypto wallet stores the private key credentials necessary to authorize blockchain transactions, sign smart contract approvals, and maintain full ownership over your digital tokens. Setting up a wallet correctly is a vital technical step.
Step-by-Step Wallet Setup Guide
-
Choose Wallet Software: Select a widely supported multi-chain browser extension or mobile application wallet compatible with your chosen blockchain.
-
Download via Official Portals: Only download wallet software directly from verified developer websites or official browser extension stores. Never download wallet utilities from unverified links or third-party file hosts.
-
Generate a New Wallet: Launch the application, select “Create New Wallet,” and establish a strong local password on your device.
-
Record the Recovery Seed Phrase: The software will display a 12-to-24-word recovery seed phrase. Write these words down by hand in exact numerical order on physical paper.
-
Verify the Seed Phrase: Complete the in-app confirmation quiz by selecting words from your seed phrase in the correct order.
-
Fund Your Wallet: If your chosen network requires gas fees for minting or contract initialization, transfer a small amount of native cryptocurrency from a trusted exchange into your public wallet address.
-
Connect to Marketplace: Navigate to your chosen marketplace, select “Connect Wallet,” and approve the authorization prompt inside your wallet interface.
Essential Security Practices
-
Never Disclose Your Seed Phrase: No legitimate customer service representative, marketplace administrator, artist collaborator, or buyer will ever ask for your recovery phrase or private keys. Anyone who gains access to your seed phrase can take complete control of your wallet assets.
-
Beware of Phishing Campaigns: Bookmark official marketplace URLs directly in your web browser. Avoid clicking links provided in unsolicited direct messages, comment threads, or suspicious emails.
-
Utilize Hardware Storage: For managing valuable collections or long-term treasury funds, consider pairing your software wallet with a hardware wallet device. Hardware wallets store private keys offline on a physical chip, requiring manual button presses on the device to approve any outbound transaction.
Choose an NFT Marketplace
NFT marketplaces serve as visual front-end portals that allow users to interact with underlying smart contracts to mint, buy, sell, and inspect digital assets. Evaluate potential marketplaces using key criteria:
Blockchain Compatibility
Verify that the platform fully supports the specific blockchain network you selected for your project. While some marketplaces operate across multiple chains, others cater exclusively to a single network ecosystem.
Minting Infrastructure and Options
Look for platforms that offer flexible minting workflows suited to your financial budget. Many modern marketplaces support “lazy minting,” a process where the creator uploads the artwork and signs metadata off-chain without paying upfront gas fees. The token is officially minted onto the blockchain only when a buyer completes the purchase, transferring the network fee to the buyer at the moment of sale.
Fee Structures and Royalty Frameworks
Research the financial mechanics of each marketplace prior to listing your assets:
-
Platform Commissions: Most marketplaces charge a percentage fee on successful primary and secondary sales, generally ranging between 1% and 2.5% of the total transaction value.
-
Secondary Creator Royalties: Platforms handle secondary royalties differently. Review platform policies to confirm how secondary artist percentages are specified, enforced, and distributed across wallet addresses.
Mint Your NFT: Step-by-Step
Minting is the core technical milestone where your visual media file is transformed into a live, verifiable cryptographic token registered on the blockchain. Below is a step-by-step walkthrough detailing how to navigate the standard minting procedure across most major marketplaces:
-
Connect Your Digital Wallet: Navigate to your chosen marketplace home page. Click the “Connect Wallet” button in the upper navigation bar, choose your wallet provider, and approve the connection signature request inside your wallet software.
-
Select the Target Blockchain: Ensure your wallet app and marketplace interface are both toggled to the correct blockchain network (such as Ethereum, Polygon, Solana, or Base).
-
Open the Creation Portal: Click the “Create,” “Mint,” or “Studio” button located in the primary site menu to launch the asset creator wizard.
-
Upload Primary Artwork Media: Drag and drop your optimized artwork file (PNG, JPG, GIF, MP4, or WEBM) into the designated upload dropzone. Verify that the file renders correctly in the visual preview box.
-
Input the Item Name: Enter the public title of your NFT. Choose a clear, distinct name that accurately reflects the asset.
-
Compose the Description: Write a detailed narrative description explaining the artistic story, creation context, technique, and overarching theme behind the piece. You can use standard formatting to organize long-form descriptions.
-
Add Properties and Trait Attributes: Enter key attributes using key-value pairs (for example, Type: Mechanical, Color: Neon Cyan, Rarity: Legendary). These properties will be formatted directly into your asset’s metadata structure.
-
Specify Supply and Edition Limits: Choose whether you are minting a single unique 1-of-1 asset or setting a fixed limited edition quantity (for example, an edition size of 50 identical copies).
-
Review All Parameter Fields: Double-check your spelling, metadata attributes, links, uploaded media quality, and selected network settings before triggering the transaction.
-
Initiate Minting Transaction: Click the “Create” or “Mint” submission button. Your connected wallet extension will pop up displaying transaction details and any required network gas fee approvals.
-
Authorize and Sign: Click “Confirm” or “Sign” inside your wallet interface to broadcast your transaction to network validators.
-
Await On-Chain Confirmation: Wait a few moments while network validators process your transaction block. Do not refresh or close your browser tab until the confirmation message appears.
-
Verify Profile Asset Display: Once the transaction completes, navigate to your public creator profile page to confirm that your newly minted token appears correctly inside your digital wallet collection.
Add Metadata and Collection Details
Metadata is the structured data payload associated with a token that supplies human-readable information to blockchains, marketplaces, wallets, and indexers. Without complete, well-organized metadata, a token is simply an anonymous number on a cryptographic ledger.
Elements of Metadata
-
Token Identifier: The official index number assigned to the individual token within its parent contract.
-
Asset Name: The public title assigned to the specific piece of artwork.
-
Description Text: Detailed background copy describing the narrative, artistic inspiration, medium, and context.
-
Media File URL: A pointer link directing browsers to where the actual image, video, or 3D asset file is stored (ideally via decentralized storage networks like IPFS).
-
Attribute Array: Formatted trait tags specifying properties, rarity parameters, background colors, and visual styles.
-
Collection Container: The parent umbrella structure that groups individual NFTs together under a single brand header.
When minting large generative collections, metadata is typically compiled into individual JSON (JavaScript Object Notation) files stored on decentralized file networks like IPFS (InterPlanetary File System). IPFS utilizes content-addressable hashing, ensuring that the visual asset and metadata attached to your token cannot be altered or deleted over time.
List and Sell Your NFT
Minting an artwork onto a blockchain creates the cryptographic token, but it does not make the item automatically available for public purchase. To allow collectors to buy your work, you must set up an active marketplace listing.
Marketplace Listing Models
-
Fixed-Price Sales: Set a static purchase price for your asset (for example, 0.1 ETH or 50 SOL). The first collector who pays the asking price instantly purchases the token, and ownership transfers automatically via smart contract execution.
-
Timed Auctions: Set a starting bid price, reserve threshold, and public auction clock. Prospective buyers place incremental bids against one another until the timer expires, at which point the highest valid bid above the reserve price wins the asset.
-
Open Offers: Leave the asset unpriced and unlisted on open marketplaces. Collectors can submit individual binding purchase offers directly to your wallet, which you can accept or decline at your discretion.
Price Planning and Transaction Flow
When pricing your work, factor in all associated costs, including initial network gas fees, marketplace listing charges, and platform sales commissions. Once a buyer completes a purchase, the underlying smart contract automatically routes the token to the buyer’s wallet while transferring the net funds directly into your creator address.
Minting an NFT does not guarantee that someone will purchase it. Building recognition, establishing creative value, and reaching potential collectors require ongoing effort beyond the technical setup.
Common Mistakes Beginners Should Avoid
Navigating the intersection of digital art and blockchain technology involves avoiding several common pitfalls:
-
Copyright Infringement: Never mint artwork created by other artists, fan art based on trademarked intellectual property, or stock media downloaded without clear legal permissions.
-
Ignoring Commercial Usage Terms: Always check licensing agreements for brushes, 3D assets, fonts, or AI generators to ensure they permit commercial sale as digital assets.
-
Neglecting Network Gas Costs: Failing to research peak network congestion times can lead to paying unnecessary fees for standard minting actions.
-
Improper Wallet Key Storage: Storing seed phrases in unencrypted cloud files, email drafts, or mobile device screenshots leaves your wallet vulnerable to unauthorized access.
-
Inconsistent Collection Dimensions: Uploading mixed aspect ratios or varying canvas resolutions creates a cluttered visual appearance across digital gallery displays.
-
Creating Overly Large Initial Collections: Launching a 10,000-piece collection before building an initial audience or testing your core concept can lead to poor engagement and high upfront costs.
-
Rushing Without Strategy: Expecting immediate sales without sharing your creation process, telling your artistic story, or engaging with creator communities often results in unvisited listings.
How to Make NFT Art More Valuable
Long-term value in the digital asset space is driven by genuine artistic quality, original concepts, creator reputation, cohesive execution, and active engagement with your audience.
Establishing Creative Identity and Quality
Focus on developing a recognizable visual signature. Collectors frequently search for artists who maintain high technical standards, consistent craftsmanship, and a clear creative voice across their portfolio.
Storytelling and Process Transparency
Incorporate narrative storytelling into your project documentation, social channels, and marketplace listings. Sharing behind-the-scenes creation videos, preliminary concept sketches, draft iterations, and technical breakdowns helps collectors appreciate the effort behind the finished work.
Managing Scarcity and Adding Real Value
-
Maintain Intentional Scarcity: Avoid flooding the market with excessive supply. Keeping edition sizes low and releases spaced out helps maintain demand for your pieces.
-
Provide Real-World Utility: Where appropriate, offer additional value to holders, such as physical high-resolution fine art prints, access to private workshops, early access to future releases, or high-resolution master downloads for personal display setups.
Final Checklist: From Artwork to NFT
Follow this step-by-step checklist to guide your artwork through every stage from initial idea to published listing:
-
[ ] Conceptualize the central narrative, style, target audience, and release format
-
[ ] Create original visual assets or generate trait components using licensed tools
-
[ ] Format, resize, and optimize media files for web displays and fast loading
-
[ ] Review commercial licensing rights for all brushes, fonts, assets, or software used
-
[ ] Choose an optimal blockchain based on transaction costs, speed, and audience fit
-
[ ] Install a reputable digital wallet and complete the account setup
-
[ ] Write down your 12-to-24-word seed phrase on paper and store it securely offline
-
[ ] Connect your wallet to your selected marketplace
-
[ ] Upload artwork media, draft a compelling title, and write a thorough description
-
[ ] Configure structural metadata properties, attributes, and collection parameters
-
[ ] Execute the minting transaction and confirm completion on the blockchain
-
[ ] Choose your preferred listing method (Fixed Price or Timed Auction) and publish your listing
-
[ ] Share your process, present your work professionally, and engage with creator communities
Final Thoughts
Generating NFT art represents a modern convergence of digital creativity, digital ownership, and cryptographic technology. By following a structured process—conceptualizing a clear theme, crafting high-quality digital assets, selecting appropriate blockchains, configuring secure digital wallets, managing metadata carefully, and choosing the right marketplaces—you can convert your creative work into verifiable digital assets on the blockchain.
Success in this space requires patience, continuous learning, and creative dedication. Focus first on refining your artistic style, producing polished media assets, protecting your digital assets with good security practices, and sharing your journey openly. By taking systematic, practical steps, you can confidently navigate the process of creating, minting, and sharing your NFT art with a global audience.
Frequently Asked Questions
How do I generate an NFT art collection with layers and rarity?
To create a generative NFT art collection, draw your artwork in standardized canvas sizes using transparent layers for each category (such as background, body, eyes, clothing, and accessories). Export every individual trait as an isolated PNG file. You can then use open-source generator scripts or visual no-code NFT collection generators to automatically combine these layers, assign percentage-based rarity weights to specific traits, and export both the image files and matching JSON metadata files simultaneously.
What is the best free software for creating 2D and 3D NFT artwork?
For 2D raster and vector illustration, top free open-source software includes Krita, GIMP, and Inkscape. For mobile or digital tablet artists, free or low-cost options like ibis Paint X and Procreate are widely used. For 3D modeling, sculpting, and animated renders, Blender is the industry standard free open-source software, offering full rendering and lighting capabilities suitable for creating 1-of-1 assets or animated video loops.
Can I turn AI-generated artwork into an NFT and sell it legally?
Yes, you can turn AI-generated artwork into an NFT, provided you comply with the commercial usage terms of the specific AI engine used to generate the image. Many paid subscription tiers on AI generation platforms grant users full commercial rights to monetize, license, and sell generated visual outputs. Always review the platform’s current terms of service, ensure your prompts do not infringe on copyrighted trademarks or existing brand intellectual property, and edit or upscale the final output to ensure high visual quality.
How much does it cost to mint an NFT for beginners?
The cost to mint an NFT ranges from $0 to over $50 depending on the chosen blockchain and minting model:
-
Lazy Minting (Free): Many marketplaces allow you to list NFTs for free using lazy minting. The artwork is written to the blockchain only when a buyer purchases it, shifting the initial gas fee to the buyer.
-
Low-Cost Blockchains ($0.01 – $1.00): Networks like Polygon, Solana, and Base incur negligible transaction costs, making them ideal for beginners testing collection launches.
-
Ethereum Mainnet ($5.00 – $50.00+): Minting directly on Ethereum requires paying network gas fees, which fluctuate based on real-time network traffic and smart contract complexity.
What is the difference between lazy minting and standard minting?
Standard minting writes your artwork data directly to the blockchain immediately upon creation, requiring you to pay a network gas fee right away regardless of whether the item ever sells. Lazy minting uploads your media and signed metadata off-chain to a marketplace server for free. The actual cryptographic token is only minted on-chain when a collector completes the purchase, meaning you pay zero upfront network fees to list your work.
How do I store and host media files for an NFT collection permanently?
NFT artwork media files and metadata are typically stored on decentralized storage networks like IPFS (InterPlanetary File System) or Arweave rather than standard private cloud servers. IPFS uses content-addressable storage hashing, which ensures that once your image link is embedded inside the token smart contract, the underlying visual file cannot be altered, replaced, or deleted if a centralized website goes offline.