How to Create NFT Collection
 by
by 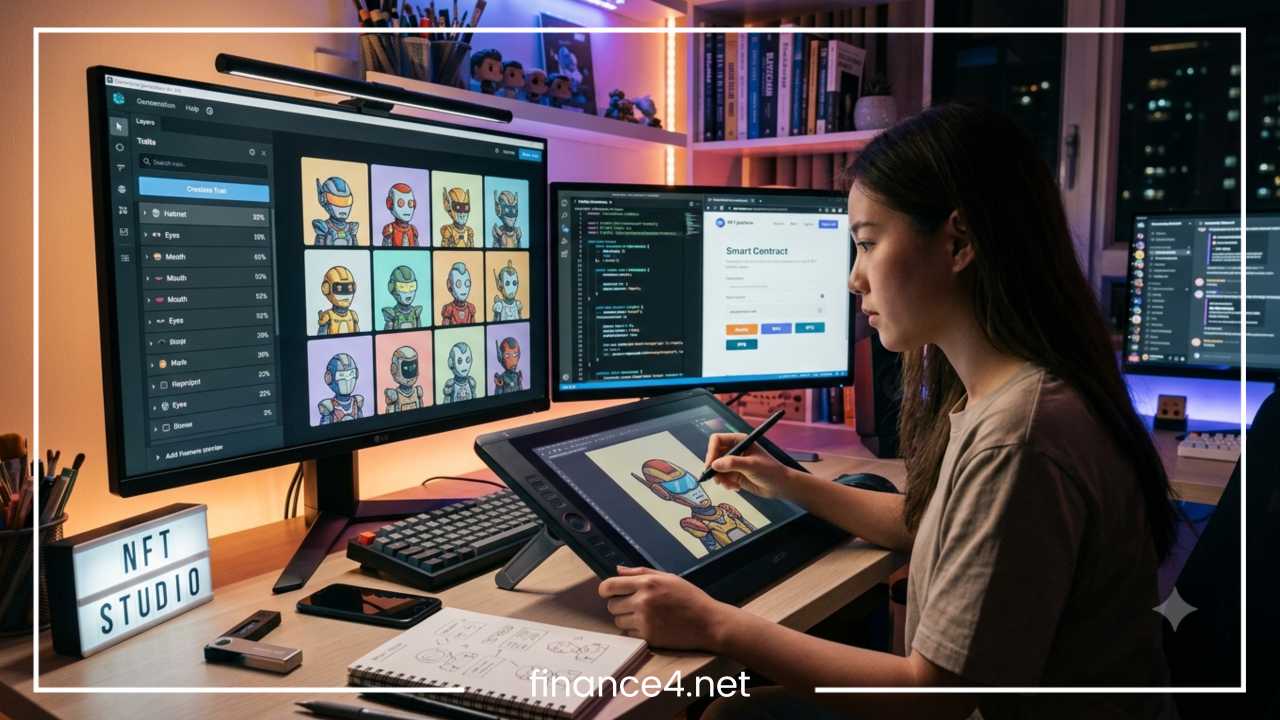
How to Create an NFT Collection: Step-by-Step Guide
Creating an NFT collection involves far more than simply uploading a series of digital images to the internet. While individual digital assets can be minted in a matter of seconds, launching a cohesive, full-scale NFT collection requires strategic planning, visual coordination, blockchain architecture, metadata configuration, and long-term project management. Artists, digital creators, global brands, and emerging Web3 startups build non-fungible token collections to establish unique digital identities, foster online communities, offer exclusive membership perks, and tokenize physical or digital assets.
A fundamental distinction exists between creating a single, one-of-one NFT and creating an entire collection. A single NFT represents an isolated piece of media—such as a standalone digital painting or a unique music file. An NFT collection, by contrast, is a structured series of digital assets bounded by a unified artistic theme, shared smart contract parameters, and often a fixed supply. A collection typically incorporates dynamic attributes, rarity tiers, and standardized metadata that allow hundreds or thousands of individual tokens to exist within a single ecosystem.
Whether you intend to launch a small series of limited-edition art pieces or a massive generative collection of thousands of unique characters, understanding the end-to-end creation workflow is crucial. This comprehensive guide details every stage of the process, taking you from early concept development and asset generation to smart contract implementation, marketplace deployment, and post-launch collection management.
What Is an NFT Collection?
A non-fungible token (NFT) is a unique digital asset whose ownership and cryptographic authenticity are recorded on a distributed ledger known as a blockchain. Unlike fungible tokens, such as Bitcoin or traditional fiat currencies, which are identical and interchangeable, every NFT possesses distinct token identifier data and embedded metadata that distinguish it from all other tokens.
An NFT collection is a curated set of individual NFTs issued under a single underlying smart contract or grouped under a shared project umbrella. Instead of operating as isolated entries, the tokens within a collection share structural similarities, programmatic logic, and visual cohesion. Collections vary dramatically in scale and structure:
-
One-of-One (1/1) Collections: Curated series where every single token features entirely distinct, hand-crafted artwork without overlapping base layers or programmatically generated traits.
-
Limited Edition Collections: Small sets where identical digital assets are minted in fixed, numbered quantities (for example, ten identical copies of five distinct artworks).
-
Generative Collections: Large-scale projects—often comprising 1,000 to 10,000 distinct items—created by programmatically combining various visual layers, traits, and assets using specialized software algorithms.
At the core of any large collection is the concept of traits and attributes. Traits are specific visual or functional elements assigned to a token, such as background color, headwear, facial expressions, clothing, or held items. The unique combination of these traits determines an individual token’s overall visual appearance and relative rarity score within the broader series.
When a collector views an item within an NFT collection on a public marketplace, they are interacting with three primary elements: the Token ID (the unique cryptographic index assigned to the item), the Smart Contract (the code governing token minting, transfer, and ownership rules), and the Metadata (a standardized file pointing to the visual asset, listing its specific attributes, and recording its descriptive properties).
How to Create an NFT Collection
Successfully bringing an NFT collection from an idea to a live blockchain network requires executing a multi-phase technical and creative roadmap. Follow these structured steps to build your collection efficiently and securely.
Define Your Collection Concept
Before designing artwork or writing code, establish a clear structural foundation for your project. A well-defined concept anchors your creative decisions and helps communicate the purpose of the project to future holders.
Begin by determining the visual and thematic identity of your project. What story does the collection tell? Is it an abstract artistic exploration, a character-driven universe, a functional gaming asset, or a digital access pass? Visual brand recognition is vital in crowded digital environments, making cohesive design themes essential.
Identify your intended target audience. Different audiences evaluate digital assets using distinct criteria:
-
Art Collectors: Prioritize artistic quality, creator reputation, visual depth, and historical significance.
-
Web3 Enthusiasts: Focus on tokenomics, technical architecture, decentralization standards, and innovative contract features.
-
Gaming Communities: Value in-game utility, interoperability, statistical balance, and asset functionality.
-
Brand Communities: Look for tangible real-world perks, brand alignment, exclusive access, and physical redemption options.
Next, decide on the appropriate total token supply. Choosing a total supply shapes market dynamics, scarcity, and distribution strategies. A small collection of 50 to 500 items creates immediate scarcity and is easier to distribute to a tightly knit core audience. A large collection of 5,000 to 10,000 items allows for broader distribution, expanded community building, and lower individual entry barriers, but it requires significantly higher asset production efforts and market demand to sell out completely.
Finally, establish the overarching purpose of the project. Clearly delineate whether the tokens act strictly as digital art, membership passes to an exclusive group, functional credentials inside software applications, or digital identity avatars.
Plan Your NFT Artwork and Traits
If you choose to create a large generative collection, the design workflow requires careful layer planning rather than drawing each piece individually. Generative art uses a layer-stacking methodology where independent image files are programmatically combined to construct thousands of unique final images.
Establish a clear visual hierarchy for your asset layers. The typical layer distribution stack follows a logical front-to-back ordering system:
-
Background Layer: Base colors, gradients, textured patterns, or atmospheric environments.
-
Back Accessories: Wings, back-mounted items, or subtle background elements behind the main character.
-
Base Character / Body: The core silhouette, skin tone, or underlying physical structure.
-
Clothing / Outfits: Shirts, armor, suits, or jackets fitted precisely to the base body layer.
-
Facial Features: Eyes, mouth expressions, facial hair, or skin markings.
-
Eyewear / Headwear: Glasses, masks, hats, helmets, or hair variations.
-
Handheld / Front Accessories: Items held by the character or elements appearing in the absolute foreground.
When designing traits, visual consistency across layers is mandatory. Every hat variation must sit accurately on every head shape; every piece of clothing must align seamlessly with the base character outline. Failing to maintain strict dimensional alignment causes clipping errors, where background layers inadvertently show through foreground items or textures overlap unnaturally.
Plan trait rarity parameters early. Rarity determines how frequently a specific trait appears across the total supply. You might designate certain background colors as common (appearing in 20% of the total collection), while special accessories remain legendary (appearing in only 0.5% of the total tokens). Balancing rarity tiers creates variation and adds an element of discovery during the minting process.
Create and Organize Your NFT Assets
Once the individual visual components are designed, convert your raw files into production-ready digital assets. High-quality asset pipeline management prevents asset corruption and metadata errors during contract deployment.
Select appropriate canvas dimensions and file formats based on your distribution requirements. Standard generative collections typically use canvas sizes of 2000×2000 pixels or 3000×3000 pixels at 300 DPI to guarantee crisp rendering across displays, mobile devices, and physical prints. Common image formats include PNG (essential for layer transparency), SVG (for scalable vector art), or high-bitrate MP4/GIF formats for animated components.
Organize your trait files into structured folder hierarchies corresponding to their respective layer orders. A standardized folder layout simplifies batch processing during asset generation:
-
Folder: 01_Background(contains files likeBlue.png,Red.png,Gold.png) -
Folder: 02_Body(contains files likeBase_Light.png,Base_Dark.png) -
Folder: 03_Clothing(contains files likeTshirt.png,Suit.png) -
Folder: 04_Eyes(contains files likeHappy.png,Sunglasses.png)
To combine these layers programmatically, use generative art scripts (written in Python or JavaScript) or dedicated open-source generative art software tools. These tools allow you to assign exact percentage probabilities to each file within a folder, guaranteeing that rare traits appear according to your precise mathematical specifications.
After running the generation program, review your output folder thoroughly. Perform a manual quality assurance audit on a large sample size of generated combinations to detect visual misalignments, conflicting trait combinations, or broken file renders before proceeding to metadata construction. Ensure you retain full legal ownership, copyright clearances, or commercial licensing rights for every element, font, texture, and visual asset used in your production pipeline.
Choose a Blockchain
Selecting the right blockchain network is a foundational decision that impacts developer options, user transaction costs, marketplace availability, and environmental impact. Because smart contracts cannot be easily altered after deployment, evaluate network tradeoffs carefully before committing.
| Blockchain Network | Transaction Fees (Gas) | Transaction Speed | Ecosystem & Marketplace Support | Target Audience & Considerations |
| Ethereum | High (Fluctuates with network congestion) | Moderate (12–15 seconds per block) | Highest liquidity, supported by all major marketplaces | High-value art, institutional collections, premium collector bases |
| Polygon | Very Low (Fractional cents) | Fast (2–3 seconds) | Broad support across major marketplaces, strong brand adoption | High-volume collections, gaming assets, low-cost minting strategies |
| Solana | Extremely Low (Sub-cent) | Extremely Fast (Sub-second finality) | Vibrant ecosystem, dedicated native marketplaces | Active trading communities, fast transactions, high-throughput utility |
| Base | Very Low (Cent scale) | Fast (2 seconds) | Growing EVM ecosystem, seamless integration with consumer apps | Web3 native apps, social commerce, mainstream consumer onboarding |
Blockchains fall primarily into two architectural categories: EVM (Ethereum Virtual Machine) networks and non-EVM networks. EVM-compatible chains (such as Ethereum, Polygon, Base, and Arbitrum) share smart contract standards like ERC-721 and ERC-1155. This allows developers to use identical code bases, development tools, and deployment environments across multiple networks. Non-EVM chains (such as Solana) use distinct programming languages (like Rust) and token standards, requiring network-specific tools and wallet architecture.
Set Up a Crypto Wallet
A cryptocurrency wallet acts as your digital identity, administrative access key, and financial gateway when deploying an NFT collection. The wallet stores your private keys, enabling you to sign smart contract transactions, pay deployment network fees, and manage administrative settings on collection portals.
Choose a reputable, highly secure software or hardware wallet that natively supports your chosen blockchain ecosystem. Popular options include browser extension wallets, multi-chain mobile applications, or cold-storage hardware devices. Hardware wallets are strongly recommended for project deployment because they isolate your private administrative keys from internet-connected memory environments, preventing unauthorized access.
Once installed, your wallet generates a unique seed phrase (typically 12 or 24 random words). This seed phrase is the ultimate recovery mechanism for your wallet and its contents:
-
Write the seed phrase down manually on paper or stamp it onto physical metal media.
-
Never store your seed phrase in plain text files, cloud storage accounts, or email drafts.
-
Never share your seed phrase or private key with anyone, including support staff or service portals.
-
Be cautious of phishing attempts, malicious browser extensions, and counterfeit minting websites that attempt to hijack administrative wallet signatures.
Fund your wallet with the target blockchain’s native token (such as ETH for Ethereum/Base/Polygon or SOL for Solana) from a verified exchange. You will need these funds to cover smart contract deployment fees, initial metadata configuration calls, and asset testing costs.
Prepare Your NFT Metadata
NFT metadata is a standardized JSON (JavaScript Object Notation) file linked to each individual token ID. The metadata file contains key details about the asset, including its name, description, media URL, and attribute lists. When a marketplace displays an NFT, it reads this JSON file to show the artwork, title, and rarity traits to users.
Below is an example of a fully structured, standard EVM-compliant NFT metadata JSON file:
{
 "name": "Cosmic Explorer #0042",
 "description": "A unique digital adventurer exploring decentralized frontiers across the cosmos.",
 "image": "ipfs://QmXoypizjW3WknFiJnKLwHCnL72vedxjQkDDP1mXWo6uco/42.png",
 "external_url": "https://example.com/explorers/42",
 "attributes": [
 {
 "trait_type": "Background",
 "value": "Nebula Blue"
 },
 {
 "trait_type": "Base Character",
 "value": "Android Tier 2"
 },
 {
 "trait_type": "Outfit",
 "value": "Flight Suit"
 },
 {
 "trait_type": "Eyes",
 "value": "Laser Visor"
 },
 {
 "trait_type": "Rarity Score",
 "value": 88
 }
 ]
}
Metadata files must be stored on reliable hosting infrastructure to ensure your collection assets remain accessible permanently. Storing media files on traditional centralized cloud servers introduces single-point-of-failure risks; if the server goes offline, the NFT’s artwork will fail to load.
To prevent this issue, use decentralized, immutable storage networks such as the InterPlanetary File System (IPFS) or Arweave. IPFS uses content-addressable storage hashing: every file receives a cryptographic content identifier (CID) derived directly from the file’s data. If the asset’s data does not change, its storage link remains permanently stable, guaranteeing that the token’s underlying artwork cannot be silently swapped or modified.
Create or Deploy an NFT Smart Contract
The smart contract is the core software program that governs your collection on the blockchain. It maintains the registry of token owners, executes minting functions, processes transfers, enforces total supply limits, and manages administrative functions.
Smart contracts for NFT collections typically implement established ecosystem standards:
-
ERC-721 (EVM): The universal standard for non-fungible tokens on Ethereum-compatible chains. Each token ID maps to a single owner address, making it ideal for individual, distinct 1/1 assets or generative art pieces.
-
ERC-721A (EVM): An optimized variation of the ERC-721 standard developed to reduce transaction gas costs significantly when minting multiple tokens in a single transaction.
-
ERC-1155 (EVM): A multi-token standard that allows a single contract to manage both fungible items and non-fungible tokens. This standard is commonly used in gaming environments and limited-edition series.
Creators can choose between two main smart contract deployment routes:
-
No-Code / Platform Contracts: Online creator tools and marketplaces offer visual setup interfaces that deploy standardized smart contracts without requiring manual coding. This approach reduces technical barriers, but it can limit advanced custom logic and bind your project to specific platform features.
-
Custom Smart Contracts: Written natively in languages like Solidity (for EVM chains) or Rust (for Solana), custom contracts allow developers to code bespoke mechanics. These can include complex whitelist reservation logic, dynamic metadata alterations, custom staking mechanisms, and programmatic royalty splits.
Before deploying any contract to a live mainnet, test every function thoroughly on an official testnet environment (such as Ethereum Sepolia or Solana Devnet). Verify that minting limits are respected, metadata links resolve accurately, and administrative functions execute as expected without vulnerabilities.
Mint Your NFT Collection
Minting is the process of writing token data to the blockchain, which officially creates the non-fungible token on-chain. Depending on your collection design, minting can be executed by the contract owner prior to listing or completed on-demand by buyers via a dedicated public launch page.
Follow this workflow to complete the minting phase:
-
Connect your deployment wallet to your preferred platform or custom smart contract portal.
-
Upload your finalized media assets and metadata JSON directories to IPFS.
-
Link the base metadata IPFS directory URI to your smart contract’s base configuration parameters.
-
Define key minting variables: total supply cap, maximum mint allowance per wallet, and public minting price.
-
Set creator royalty percentages (typically ranging from 2.5% to 10%) and assign payout addresses where secondary market royalties should be routed where supported by marketplaces.
-
Submit the contract deployment transaction to the blockchain and pay the network gas fee.
-
Verify the smart contract code on a block explorer (such as Etherscan) to maintain transparency with buyers.
-
Execute a test mint on the contract to ensure token IDs map accurately to their corresponding IPFS metadata files.
Understand the operational distinction between Minting (writing the token into existence on-chain), Listing (placing a minted token up for sale on an open marketplace at a designated price), and Buying (transferring payment to acquire a token and update its ownership record).
Prepare for the Collection Launch
A smooth launch requires careful preparation across your technical infrastructure, community channels, and marketing assets before opening public minting.
Establish transparent, secure online presence channels:
-
Official Launch Page: A simple, secure website displaying your collection narrative, minting portal, interactive roadmap, verified smart contract address, and creator details.
-
Social Media Platforms: Dedicated channels for broadcasting project updates, previews, and official announcements.
-
Community Platforms: Moderated community servers (like Discord or Telegram) where holders can communicate, view updates, and ask support questions.
Implement security best practices to protect your audience prior to launch. Clearly list official smart contract addresses and official URLs across all public channels. Warn your community that project administrators will never send direct messages requesting private keys, seed phrases, or urgent transfers.
Structure your launch timeline into clear phases. Many projects use a two-tiered launch process:
-
Allowlist / Whitelist Phase: A reserved mint window that lets active community members, early supporters, or partner project holders mint tokens without competing in high-gas network rushes.
-
Public Mint Phase: An open access period where any user can connect a crypto wallet to the launch page and mint remaining tokens until the total supply limit is met.
Promote and Manage Your Collection After Launch
The launch phase is only the beginning of an NFT collection’s lifecycle. Ongoing operational management, community engagement, and utility delivery are critical for maintaining long-term audience interest and project trust.
Monitor ongoing secondary marketplace activity and ownership metrics using block explorers and platform analytics dashboards. Track key metrics such as unique holder ratios, floor prices, trading volumes, and token distribution spread to gauge market health.
Maintain continuous communication across your project’s official channels:
-
Publish regular progress updates on project milestones and planned utility rollouts.
-
Host interactive live discussions or question-and-answer sessions with team leads.
-
Provide active customer support for holders navigating wallet connections or metadata rendering delays.
-
Deliver on promised roadmap goals, whether they involve physical merchandise, access to exclusive software tools, live event tickets, or creative expansions.
Implement safety measures against bad actors who target successful collections. Monitor marketplace platforms for unauthorized counterfeit collections copying your visual assets, and file intellectual property takedown notices promptly to protect buyers.
Costs of Creating an NFT Collection
Creating and launching an NFT collection involves various potential expenses depending on your technical capabilities, production choices, and marketing requirements. While some creators use self-directed setups to launch low-cost projects, complex endeavors require dedicated capital allocation across several core categories.
| Budget Category | Description & Expenses | Estimated Cost Range |
| Artwork & Asset Production | Design commissions, 3D modeling fees, trait layer creation, generative code scripting, and digital file optimization. | Free (Self-created) to $5,000+ |
| Smart Contract & Development | Contract development fees, custom minting engine setup, testnet operations, and professional security code audits. | Free (No-code tools) to $10,000+ |
| Blockchain Network Fees (Gas) | Mainnet contract deployment, contract parameter initialization, and base token minting fees paid to network validators. | $5 to $500+ (Varies by network) |
| Decentralized Media Storage | File pinning services for IPFS or permanent storage allocations on decentralized networks like Arweave. | $10 to $200 (Based on total size) |
| Infrastructure & Web Hosting | Custom domain registrations, web hosting, SSL certificates, and front-end interface development. | $20 to $500 per year |
| Marketing & Community Setup | Brand design, promotional content, community management software, social media campaigns, and live event hosting. | Variable based on scale |
Common NFT Collection Creation Mistakes to Avoid
Navigating the Web3 ecosystem requires technical diligence and strategic awareness. Avoiding common development and project management mistakes can save your project from early security failures or reputational damage.
-
Launching Without a Distinct Concept: Replicating trending collections without adding visual originality, technical innovation, or real value often leads to weak buyer demand and fast market fatigue.
-
Neglecting Metadata and Asset Storage Security: Storing asset files on traditional web servers instead of decentralized storage networks like IPFS risks permanent asset loss if server hosting contracts expire or drop offline.
-
Ignoring Smart Contract Security Standards: Deploying unverified or un-audited smart contracts exposes your project to vulnerabilities, exploits, or admin access compromises that can harm token holders.
-
Failing to Estimate Gas Costs: Selecting a high-cost blockchain network during peak traffic periods can result in minting fees that exceed the price of the NFT itself, pricing out potential buyers.
-
Overpromising Unrealistic Utility Roadmaps: Promising overly complex deliverables (such as enterprise software or full-scale video games) without adequate resources or realistic timelines undermines team credibility and damages long-term trust.
-
Poor Administrative Wallet Security: Storing administrative wallet access keys in unencrypted environments or signing unverified web transactions risks losing ownership control of the collection smart contract.
-
Neglecting Post-Launch Communication: Ceasing updates immediately after the initial mint phase weakens community trust and causes holder engagement to decline rapidly.
NFT Collection Launch Checklist
Use this practical, step-by-step checklist to track your progress from initial concept design through post-launch management:
-
Concept & Planning
-
Define visual theme, story, and core target audience.
-
Determine total token supply and rarity distribution parameters.
-
Map out long-term goals, utility offerings, and project scope.
-
-
Asset Creation & Production
-
Design base artwork and trait layers with proper visual alignment.
-
Organize trait layers into clean, structured folder hierarchies.
-
Run generative art scripts to compile token images and verify output quality.
-
Secure full legal ownership and commercial licensing rights for all visual assets.
-
-
Technical Architecture & Setup
-
Select a blockchain network based on speed, cost, and ecosystem support.
-
Set up a hardware crypto wallet and back up your seed phrase securely offline.
-
Generate standardized JSON metadata files for every token ID.
-
Upload media assets and metadata files to decentralized storage (IPFS/Arweave).
-
-
Smart Contract & Deployment
-
Draft or select an appropriate smart contract standard (e.g., ERC-721A).
-
Test all smart contract functions thoroughly on an official testnet.
-
Deploy the smart contract to the target mainnet and verify the source code.
-
Configure creator royalty splits and administrative payout addresses.
-
-
Launch & Post-Launch Execution
-
Build a secure website and launch portal displaying verified contract addresses.
-
Set up official social media channels and moderated community spaces.
-
Execute allowlist and public mint phases according to your launch schedule.
-
Monitor secondary marketplace listings, deliver on roadmap goals, and maintain consistent community communication.
-
Final Thoughts
Creating a successful NFT collection requires a balance of visual creativity, clear strategic planning, and sound technical execution. From organizing trait layers and configuring IPFS metadata to choosing a compatible blockchain and deploying smart contracts, each step directly affects the security, functionality, and longevity of your digital assets.
While launching your collection on-chain is a major technical milestone, it represents only the beginning of the project lifecycle. Long-term value in the Web3 space is driven by transparent communication, consistent execution of project goals, active community management, and sustained creative output. By establishing a solid foundation, prioritizing smart contract security, and maintaining realistic expectations, creators and brands can launch digital collections that resonate with audiences across the decentralized Web.
Frequently Asked Questions
How do I create an NFT collection with no coding experience?
You can create an NFT collection without writing code by using no-code generative art software (such as NFT Art Generator or Figma plugins) to compile your image layers. For smart contract deployment and minting, platforms like OpenSea, Studio, or Thirdweb provide visual setup wizards that handle the smart contract deployment and metadata generation automatically.
How much does it cost to launch a 10k NFT collection?
The cost to launch a 10,000-item collection ranges from $50 to over $10,000, depending on your chosen blockchain and development approach. On low-cost networks like Polygon, Base, or Solana, deployment and gas fees can cost under $20. On Ethereum mainnet, smart contract deployment and metadata initialization can cost $100 to $500+ in gas fees alone, plus optional expenses for custom developer code, security audits, and marketing.
Can I create an NFT collection for free?
Yes, you can launch an NFT collection for free by utilizing lazy minting on supported marketplaces like OpenSea or Rarible. Lazy minting defers writing the token to the blockchain until a buyer purchases it, shifting the initial gas fees from the creator to the buyer. Additionally, using low-gas EVM networks or free creator tools keeps initial setup costs at zero.
What software is best for generating 10k generative NFT artwork?
To create generative layers, artists frequently use professional design software like Adobe Photoshop, Illustrator, or Blender (for 3D assets). To programmatically merge those layers into thousands of unique images with metadata JSON files, creators rely on open-source scripts like HashLips Art Engine or no-code generators like Bueno, NFT-Inator, or Figma NFT Generator plugins.
How do creators make money from an NFT collection after the initial mint?
Creators generate revenue through two main streams: primary mint sales (the initial purchase price paid by buyers during the public launch) and secondary market royalties. Creators can set a royalty percentage (typically between 2.5% and 10%) encoded in the contract or enforced via marketplace standards, earning a percentage fee every time a token is resold on secondary platforms.
What is the difference between ERC-721 and ERC-721A smart contracts?
ERC-721 is the standard protocol for non-fungible tokens on Ethereum where each token mint requires an individual data state change on-chain. ERC-721A is an optimized variation created by Azuki that allows buyers to mint multiple NFTs in a single transaction for almost the same gas fee as minting a single item, drastically reducing network transaction fees during large collection launches.
How do I store my NFT collection artwork permanently on IPFS?
To keep media assets accessible permanently without relying on centralized servers, creators upload raw image files and JSON metadata folders to IPFS (InterPlanetary File System) using pinning services like Pinata, NFT.Storage, or Web3.Storage. These services pin the content across distributed nodes, generating immutable Content Identifiers (CIDs) that are then hardcoded into the collection’s smart contract.