How to Transfer NFT Ownership
 by
by 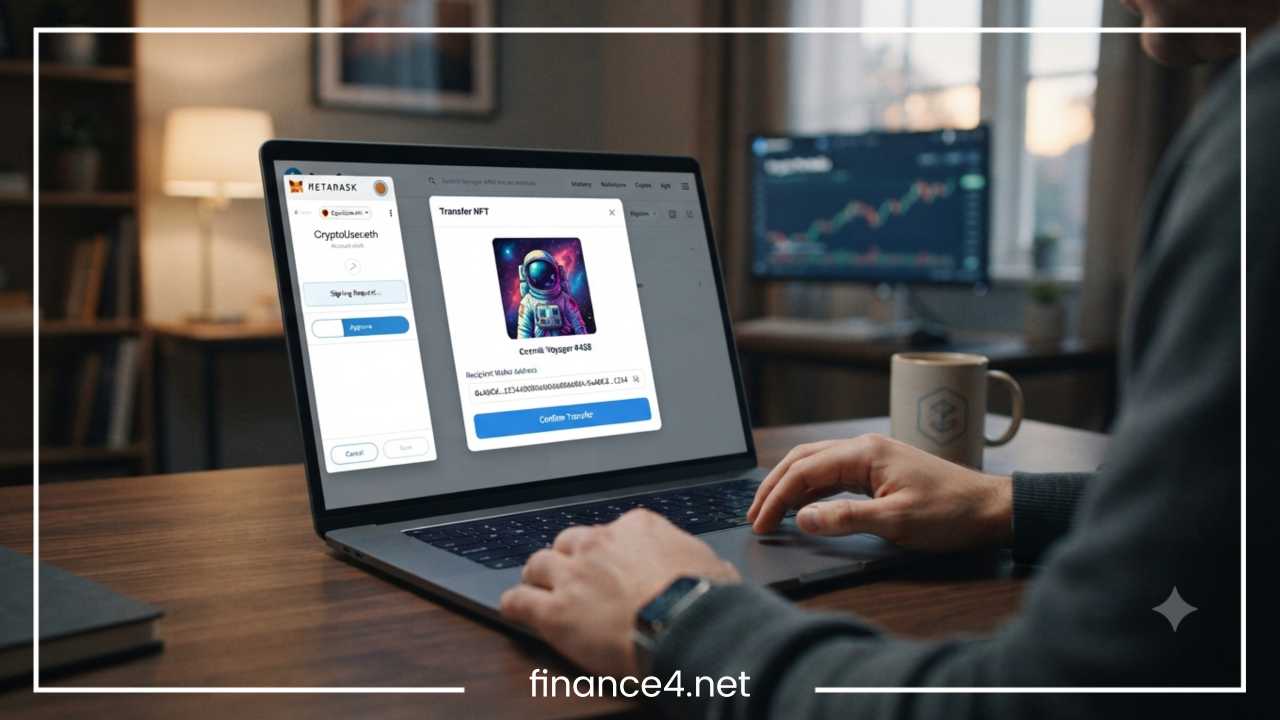
How to Transfer NFT Ownership Easily | Step-by-Step Guide
The rise of digital assets has completely transformed how we perceive ownership in the digital age. At the center of this revolution are Non-Fungible Tokens (NFTs), unique digital identifiers cryptographic in nature, which prove ownership of a specific asset on a blockchain network. Whether you are an avid collector, a digital artist, a web3 gamer, or a business exploring decentralized technologies, knowing how to transfer NFT ownership safely and efficiently is a fundamental skill.
While the concept of shifting an active asset across a blockchain might seem intimidating to beginners, the underlying mechanics are highly accessible once you break them down. Transferring an NFT does not require deep programming knowledge. Instead, it involves utilizing decentralized wallet applications to update a public ledger.
There are several everyday scenarios where an NFT wallet transfer becomes necessary:
-
Selling an NFT: Transferring the token to a buyer following a direct agreement or a peer-to-peer transaction.
-
Gifting an NFT: Sending a digital collectible to a friend, family member, or community member as a present or promotional reward.
-
Moving assets between wallets: Migrating your digital collectibles from a hot wallet (software-based) to a cold wallet (hardware-based) to maximize asset security.
-
Business or gaming purposes: Transferring utility-based tokens to a smart contract for staking, using assets within a decentralized application (dApp), or deploying digital intellectual property for commercial ventures.
Every time an NFT changes hands, a dedicated blockchain transaction occurs. This transaction updates the shared ledger, rewriting the digital title deed to reflect the public address of the new owner. By following the correct protocols, double-checking your inputs, and adhering to basic security guidelines, you can seamlessly execute these movements without the fear of losing your valuable digital assets.
What Does NFT Ownership Transfer Mean?
To truly grasp how to transfer NFT ownership, it is vital to understand what happens behind the scenes on the blockchain ledger. An NFT transfer is not like copying a digital file or sending a photo via email. When you email a file, the original copy remains on your hard drive while a duplicate is sent to the recipient. On the blockchain, duplicates cannot exist for a non-fungible asset. Instead, a transfer represents a permanent shift of exclusive access rights from one cryptographic address to another.
It is important to clarify the distinct differences between the various methods of moving or transacting digital assets:
-
Sending an NFT to another wallet: This is a direct, wallet-to-wallet transaction that does not involve an escrow contract or a financial exchange. It is akin to handing a physical collectible directly to another person.
-
Selling an NFT through a marketplace: This method relies on automated smart contracts. The marketplace acts as an intermediary, holding the NFT until the buyer provides the required funds. Once the financial condition is met, the contract automatically executes the ownership transfer and distributes the crypto funds simultaneously.
-
Transferring ownership rights vs. transferring the token: Sending a token to a new wallet address transfers the cryptographic token itself. However, it does not inherently transfer the underlying intellectual property (IP), commercial copyrights, or legal licensing rights of the artwork unless explicitly defined by the creator or the project’s legal terms. The creator of the collection may still retain original authorship rights and continue to receive automated secondary royalties whenever the token is sold in the future.
Ultimately, all NFTs reside permanently on decentralized blockchain networks like Ethereum, Polygon, or Solana. The tokens themselves never leave the blockchain layer. Instead, ownership is defined by which specific cryptographic wallet address holds the private keys required to control that token ID. When a successful transfer is validated by the network, the public ledger updates instantly, reflecting the recipient’s wallet address as the new official holder.
How NFT Ownership Transfer Works
The underlying technical architecture of a digital asset transfer relies on a decentralized consensus mechanism. Although the user interface of most modern wallets simplifies the process down to a few clicks, the blockchain executes a highly structured sequence to ensure validity, authenticity, and immutability.
The Initial Action
The process begins when the current NFT owner logs into their cryptographic wallet or an integrated marketplace platform. The user must actively choose the specific asset from their digital gallery. To initiate the action, the owner inputs the precise destination address of the recipient. At this stage, the wallet software constructs a transaction payload that targets the NFT’s specific smart contract address, passing along instructions to move the unique Token ID from the sender’s address to the destination address.
The Validation Stage
Once the user approves the transaction via their private key, the request is broadcasted to the wider peer-to-peer blockchain network. The transaction enters a temporary holding pool, often referred to as the memory pool or mempool. Network nodes, validators, or miners pick up this transaction to verify its authenticity.
The network verifies that the sending wallet truly holds the specific token, that the sender has sufficient funds to cover the network processing fees, and that the cryptographic signature matches the owner’s public address. Once verified, the transaction is bundled into a new cryptographic block and permanently written to the ledger history.
The Final Update
As soon as the block is confirmed and appended to the history, the ownership state shifts. The original owner loses the ability to move or interact with that asset, while the recipient’s public wallet address gains full cryptographic command over it. The entire history of this transaction is public and auditable, remaining accessible indefinitely via a public blockchain explorer.
To contextualize this process, consider how it applies across different primary networks:
-
Ethereum NFT Transfer: Typically relies on the ERC-721 or ERC-1155 token standards. The user triggers a function built into the smart contract, paying a network fee in Ether (ETH) to finalize the adjustment.
-
Polygon NFT Transfer: Utilizes a framework identical to Ethereum but operates on a Layer-2 scaling network. Transactions require MATIC or POL tokens to process, completing at a fraction of the cost of the main layer.
-
Solana NFT Transfer: Built upon the SPL token standard. Transactions bypass heavy smart contract executions in favor of rapid, direct ledger updates, requiring trivial amounts of SOL to execute in a matter of seconds.
Things to Know Before Transferring an NFT
Before you press the final confirmation button on any digital asset transaction, there are several fundamental concepts you must understand. The decentralized nature of blockchain technology gives users complete control over their wealth, but it eliminates the safety nets found in traditional banking systems.
Verify the Recipient Wallet Address
Cryptocurrency and blockchain transactions are entirely irreversible. There is no customer support line, no bank manager, and no central entity capable of pulling an asset back once a block is confirmed. If you send an NFT to an incorrect address, it is gone permanently.
Because public cryptographic keys consist of long, randomized strings of alphanumeric characters, you should never attempt to type out a wallet address manually. A single misplaced character or casing error will result in the permanent loss of the asset. Always use the built-in copy-and-paste functionalities, or utilize secure QR code scanning features whenever possible. Furthermore, it is wise practice to verify the first five and last five characters of the pasted address against the source text to guarantee no malicious software has altered the clipboard data.
Check Blockchain Compatibility
Cross-chain compatibility is one of the most common pitfalls for newcomers in the web3 space. Assets created on a specific blockchain network can only exist and move within that precise ecosystem or its explicitly bridged networks.
[Ethereum Network Asset] ----> Must stay on ----> Ethereum-Compatible Wallet (e.g., MetaMask)
[Solana Network Asset] ----> Must stay on ----> Solana-Native Wallet (e.g., Phantom)
If you attempt to send an Ethereum-based NFT directly to a native Solana wallet address, the transaction will either fail entirely at the wallet validation phase or, worse, the token will be sent to an unrecoverable address on the target network, destroying the asset. Always confirm that the recipient’s wallet actively supports the exact network hosting the NFT.
Understand Gas Fees
Every interaction with a blockchain network requires computational power to process and validate data. The monetary cost of this computational effort is known as a gas fee or network fee.
Gas fees do not go to the marketplace or the wallet provider; instead, they are distributed directly to the decentralized network of validators or miners who keep the blockchain secure. The cost of a gas fee is dynamic, fluctuating based on network congestion. If thousands of users are trying to execute transactions simultaneously, gas prices rise. The sender is universally responsible for paying these fees, meaning you must maintain a baseline balance of the network’s native cryptocurrency in your wallet to successfully process a transfer.
Confirm Ownership
It is essential to verify that the target asset is fully settled within your wallet before initiating a transfer. Ensure the item is visible inside your verified interface and that no pending transactions are tied to it. Attempting to transfer an asset that is locked in a marketplace escrow account or tied up in a pending smart contract action will cause the transaction to fail, resulting in wasted gas fees.
Step-by-Step Guide: How to Transfer NFT Ownership
Following a systematic approach ensures that your asset transfers go smoothly every single time. Below is the comprehensive framework for executing an NFT transfer safely.
Step 1: Choose a Compatible Crypto Wallet
Before moving any asset, both the sender and the receiver must possess a software or hardware wallet capable of interacting with the corresponding blockchain.
Popular examples include MetaMask, which serves as a standard for Ethereum, Polygon, and other Ethereum Virtual Machine (EVM) networks. For ecosystems like Solana, Phantom is widely regarded as the premier choice. For individuals seeking maximum protection for high-value assets, integrating a hardware wallet like a Ledger or Trezor provides an isolated environment where private keys never touch an internet-connected device. Regardless of the choice, ensuring your wallet application is up to date and that your recovery phrase is securely stored offline is a non-negotiable prerequisite.
Step 2: Connect Your Wallet
Navigate to the marketplace or wallet interface holding your digital collection. Click the prominent “Connect Wallet” option, usually positioned in the upper right-hand corner of the screen.
Select your specific wallet provider from the prompt list, which will trigger a secure pop-up window within your wallet browser extension or mobile application. Review the permissions requested by the platform. A standard connection request should only ask to view your public wallet address and account activity. Never approve a connection request that asks for access to your private keys, seed phrases, or permissions to automatically move funds without explicit approval.
Step 3: Find the NFT You Want to Transfer
Once connected, navigate to your personal profile or inventory tab to view your digital portfolio. Browse through your collected items and click on the specific NFT you intend to move.
Before proceeding, look over the core metadata parameters displayed on the token’s informational page. Confirm the precise Token ID, verify the official collection name to ensure it is not a counterfeit copy, and double-check the blockchain network icon to guarantee you are operating on the correct layer.
Step 4: Select the Transfer Option
With the specific asset page open, look for the dedicated action buttons. Depending on the platform or wallet interface you are using, this option may be labeled as “Send,” “Transfer,” or “Move.”
Clicking this button will open a dedicated transaction configuration window. This action signals the platform to draft a new smart contract transaction designed to shift the token’s registry parameters.
Step 5: Enter the Recipient Wallet Address
In the provided input field, paste the recipient’s public wallet address. Take a moment to inspect the input closely, performing a manual character verification of the beginning and end of the string.
Ensure there are no accidental spaces at the start or end of the text block. Many modern interfaces will display a green checkmark or validation message if the address format conforms to the structural rules of the active blockchain network. If the platform warns you that the address is invalid, do not attempt to force the transaction forward.
Step 6: Confirm and Approve the Transaction
Once the address is populated, click the confirmation button. This action will trigger a formal signature request window within your connected crypto wallet extension or app.
This window provides an explicit breakdown of the transaction details. It will display the asset in question, the destination address, and the estimated gas fee required to finalize the action on the network. Review these figures carefully. If the network fees are abnormally high due to temporary traffic spikes, you can choose to reject the request and wait for congestion to clear. If everything looks correct, click “Approve” or “Confirm” to sign the transaction payload with your private key.
Step 7: Verify Successful Transfer
After approving the signature request, your wallet will broadcast the transaction to the network. The interface will typically display a status notification indicating that the transfer is pending.
To track the progress, look for the provided transaction hash (TxID), which serves as a unique digital receipt. You can copy this hash and paste it into an official public blockchain explorer to monitor its real-time status.
| Blockchain Network | Primary Public Explorer |
| Ethereum | Etherscan |
| Polygon | Polygonscan |
| Solana | Solscan |
Once the status on the explorer switches from “Pending” to “Success,” the transfer is complete, and the asset will instantly appear within the recipient’s wallet inventory.
How to Transfer NFT Ownership Through Popular Platforms
While the core mechanics of a blockchain transfer remain identical, the user interfaces of specific platforms vary slightly. Knowing how to steer through the most popular options simplifies the process.
Transfer NFT Using OpenSea
OpenSea remains one of the largest and most widely utilized peer-to-peer digital asset marketplaces. To transfer an NFT directly through their web interface without creating a public sale listing, follow these steps:
-
Log into the official OpenSea platform and click on your profile avatar to view your collected items.
-
Click directly on the specific item you wish to send to open its comprehensive details page.
-
Locate the action icons in the upper right quadrant of the page and click the paper airplane icon, which represents the Transfer function.
-
A prompt box will appear. Paste the recipient’s public address or registered Ethereum Name Service (ENS) domain into the address field.
-
Click the secondary Transfer button at the base of the prompt.
-
Your connected wallet extension will pop up automatically. Review the gas fee details, scroll to the bottom of the prompt, and click Confirm to authorize the network transaction.
Transfer NFT Using Blur
Blur is a high-volume marketplace tailored for frequent collectors and traders. Its minimalist, data-dense layout differs slightly from OpenSea:
-
Connect your wallet to the platform and navigate to the personal portfolio management dashboard.
-
Check the selection boxes next to the specific NFTs you intend to move. Blur allows users to batch-select multiple items to execute bulk transfers efficiently.
-
Locate the actions menu that materializes at the bottom of the dashboard layout and select the Transfer action.
-
Input the destination wallet address into the target configuration field.
-
Review the aggregated list of assets and the cumulative gas estimation metrics.
-
Click the final action button to prompt your wallet to sign the transaction, executing the shift across the network.
Transfer NFT From Wallet Directly
You do not always need to utilize a third-party marketplace platform to move your assets. If you prefer to interact directly with your software wallet application, you can execute a native transfer:
-
Open your software wallet browser extension or mobile application interface.
-
Navigate past the primary token balance screen and select the tab explicitly labeled NFTs, Collectibles, or Digital Assets.
-
Scroll through your localized visual gallery and tap directly on the item you want to move.
-
Click the native Send or Transfer button located directly beneath the asset preview image.
-
Paste the destination address into the recipient field.
-
Review the automated gas fee tiers (which often allow you to choose between slow, average, or fast processing times).
-
Click Confirm to execute the transfer directly through the ledger without external marketplace code dependencies.
How Much Does It Cost to Transfer NFT Ownership?
Executing actions on a decentralized ledger is never entirely free. Understanding the fee structures prevents unexpected financial surprises during asset management.
Gas Fees
Gas fees represent the core baseline cost of moving any digital token. They vary heavily based on the specific architectural design of the network you select.
On Ethereum, gas fees can scale dynamically from a few dollars to much higher amounts during highly anticipated project launches or intense market volatility. This variability occurs because Ethereum handles complex computational commands sequentially, meaning users must outbid one another to secure priority processing space in the upcoming block.
Marketplace Fees
When performing a direct, wallet-to-wallet transfer using a marketplace’s interface, the platform itself generally does not assess an additional platform protocol fee.
Marketplace service fees are typically reserved for successful sales transactions where financial consideration changes hands. However, it is always wise to review the final transaction preview in your wallet to verify that no unexpected service premiums are attached to the interaction.
The following data table outlines the typical cost expectations across prominent public networks:
| Blockchain | Transfer Cost | Processing Velocity |
| Ethereum | Variable; higher baseline fees based on network activity | Moderate (varies by gas bid) |
| Polygon | Highly economical; typically pennies per transaction | Rapid and efficient |
| Solana | Sub-penny costs; uniform baseline fee structure | Near-instantaneous execution |
Before confirming any transaction, always check the real-time fee estimation displayed in your wallet extension. If the network is congested, you can save money by waiting for a quieter period.
Common NFT Transfer Mistakes and How to Avoid Them
Even experienced blockchain users can run into issues if they rush through the transfer process. Awareness of common mistakes is the best defense against asset loss.
Sending NFT to Wrong Wallet Address
This remains the leading cause of accidental asset destruction in the web3 space. A simple clipboard error or a missed character can misdirect an asset to an unowned, dead address.
-
Prevention Strategy: Never type addresses manually. Always utilize copy-and-paste functions, use domain lookup tools like ENS for added clarity, and meticulously double-check the initial and concluding character sequences before finalizing any transfer.
Using Wrong Blockchain Network
Attempting to send an asset directly across incompatible network layers will lock the token out of reach. For example, a native Solana wallet cannot unpack or read an Ethereum ERC-721 smart contract asset.
-
Prevention Strategy: Ensure the destination wallet address natively aligns with the origin network hosting the NFT. If the asset resides on Polygon, the receiving wallet must be configured to view the Polygon network.
Falling for NFT Transfer Scams
Malicious actors use sophisticated phishing techniques to intercept valuable collections. These include creating replica marketplace websites that mimic authentic platforms, sending unsolicited direct messages offering fake technical support, or engineering fraudulent pop-up windows that ask for your wallet’s private seed phrase.
-
Prevention Strategy: Never enter your private recovery seed phrase into any website or digital interface for any reason. Always bookmark official marketplace URLs, and carefully read the technical wording of all wallet signature prompts before approving them.
Forgetting Gas Fees
Users frequently find themselves unable to execute transfers because their wallets hold zero native cryptocurrency to pay for gas, even if the NFT itself is highly valuable.
-
Prevention Strategy: Maintain a small, permanent reserve balance of the host network’s native asset (such as ETH, MATIC/POL, or SOL) within your active wallet to cover transaction fees effortlessly.
Losing Wallet Access
If a user migrates their assets to a secondary software wallet but fails to back up the new account’s credentials, they risk losing access to the assets entirely if their device fails.
-
Prevention Strategy: Store all private wallet recovery phrases on physical paper or durable hardware mediums kept securely offline in protected locations. Never store unencrypted seed phrases in digital notepad files or cloud storage services.
NFT Ownership Transfer vs. NFT Sale: What’s the Difference?
While both actions ultimately result in an asset moving from one public wallet address to another, their operational pathways, legal implications, and financial structures differ substantially.
Transfer
A direct transfer is a non-commercial asset migration. The transaction is initiated voluntarily by the current owner, who pays the baseline network gas fee to shift the token directly into a destination wallet.
No money changes hands within the blockchain architecture, and no intermediary escrow system is engaged. This method is best suited for gifting items to acquaintances, distributing community rewards, or consolidating personal digital assets into a highly secure offline hardware wallet.
Sale
An NFT sale is a programmatic financial exchange managed by automated smart contracts on a marketplace platform. The seller lists the asset for a specific price, and the marketplace holds the token’s execution permissions.
When an interested buyer triggers a purchase request, the smart contract verifies the availability of the buyer’s funds, collects the purchase amount, deducts marketplace platform fees, handles creator royalty percentages, and simultaneously shifts the NFT ownership block to the buyer. This approach is intended for commercial trades where trustless financial protection is required to prevent fraud.
Can You Reverse an NFT Transfer?
The fundamental core value proposition of blockchain technology is its absolute immutability. Once a transaction is picked up by validators, written into a data block, and appended to the distributed ledger, that record becomes a permanent part of the public history.
Crucial Rule: Blockchain transactions are completely irreversible. No central authority, marketplace administrator, wallet development team, or smart contract engineer possesses the capability to alter ledger history or undo a validated transfer.
If an asset is mistakenly sent to an incorrect address, the only way to recover it is if the owner of that destination address voluntarily agrees to send the asset back to you. If the address belongs to an unmanaged dead wallet or an anonymous individual who refuses to cooperate, the asset is gone for good. This reality highlights why you must pay absolute attention to detail during every step of the transfer process.
Security Tips for Safe NFT Transfers
Protecting your digital portfolio requires ongoing vigilance and proactive security habits. Implementing these strategies minimizes risk and protects your digital assets:
-
Use official wallet applications: Only download wallet software, browser extensions, and mobile applications directly from verified, official project websites or authorized application stores to avoid malicious copycats.
-
Avoid unknown links: Never click on unsolicited links sent via social media platforms, public forums, or messaging apps promising free mints, air-drops, or instant support.
-
Never share your seed phrase: Your 12-to-24-word recovery phrase is the master key to your digital assets. No legitimate marketplace representative or technical support agent will ever ask for it.
-
Enable hardware wallet security: For high-value collections, route all transaction authorizations through a physical hardware wallet. This setup ensures that your private keys remain completely isolated from internet-connected devices.
-
Verify marketplace URLs: Double-check the web domain address in your browser before connecting your wallet to ensure you are not interacting with a phishing site designed to look like a popular marketplace.
-
Check transaction details before signing: Get into the habit of reading the text inside your wallet pop-up window before approving a signature. Ensure the action matches what you intend to do, and verify that it does not grant unexpected asset draining permissions.
-
Keep software updated: Regularly update your operating system, web browsers, and crypto wallet applications to ensure you have the latest security patches against emerging exploits.
Final Thoughts
Transferring NFT ownership is a straightforward process once you understand the core steps and basic principles of blockchain mechanics. By choosing a compatible wallet, accurately copying the recipient’s public address, and ensuring you have enough native cryptocurrency to cover network gas fees, you can confidently move your digital collectibles across the web3 ecosystem.
However, the decentralized nature of blockchain technology demands careful attention to detail. Because transactions are completely permanent and irreversible, taking your time to verify every single step is essential for protecting your assets. By making verification a habit and following standard security protocols, you can easily manage, share, and protect your digital portfolio.
Frequently Asked Questions
Can you transfer an NFT from MetaMask to Phantom wallet?
Yes, you can transfer an NFT from MetaMask to Phantom, but only if the asset exists on a blockchain network that both wallets natively support. Phantom supports Ethereum, Polygon, and Bitcoin networks in addition to Solana. If your NFT is on Ethereum, you can copy your Ethereum deposit address from Phantom, open your MetaMask wallet, select the Ethereum NFT, click send, and paste the Phantom address. Never attempt to send a native Ethereum NFT to a native Solana address, as this will result in the permanent loss of the token.
How to transfer NFT from one wallet to another without paying gas?
Completely avoiding network gas fees during a direct on-chain NFT transfer is generally not possible, as blockchain validators require compensation to process the transaction. However, you can minimize costs by using gasless marketplace features like OpenSea’s gas-free transfers for specific Layer-2 networks like Polygon. Another method is utilizing “lazy minting” functions if you are a creator, which shifts the minting fee to the buyer at the exact moment of purchase rather than requiring an upfront deployment fee from the owner.
Why is my NFT not showing up in my wallet after a successful transfer?
If the public blockchain explorer confirms that the transaction was successful but the asset is missing from your wallet UI, it is usually a front-end display issue rather than a loss of funds. You can resolve this by checking the hidden or spam tabs within your wallet application, manually importing the NFT’s specific contract address and Token ID into the wallet interface, or clearing your mobile browser cache before reconnecting to the decentralized application.
What happens if I send an NFT to a regular crypto wallet address?
If you send an NFT to a regular crypto wallet address that supports the host blockchain network, the asset will arrive safely, even if the recipient’s wallet app doesn’t have a visual gallery to display it. The recipient will still cryptographically own the token on the ledger. However, if you send the NFT to an address on an incompatible network or a central exchange deposit account that does not support non-fungible tokens, the asset will be permanently locked or rejected by the platform.
Can I transfer a hidden NFT on OpenSea to another wallet?
Yes, you can transfer an NFT that appears in your “Hidden” tab on OpenSea, but you should proceed with extreme caution. If the NFT was sent to your wallet unsolicited by an unknown address, it is likely a phishing scam. Interacting with the smart contract of a malicious scam token—even just attempting to transfer it away—can trigger a hidden function designed to drain your wallet balances. If you recognize the asset and know it is safe, you can unhide it first or use the transfer tool directly within the hidden menu interface.